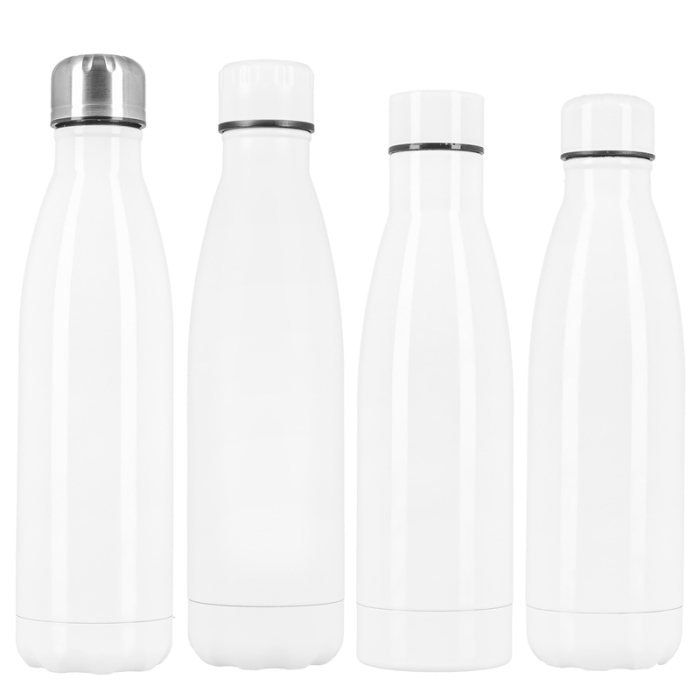
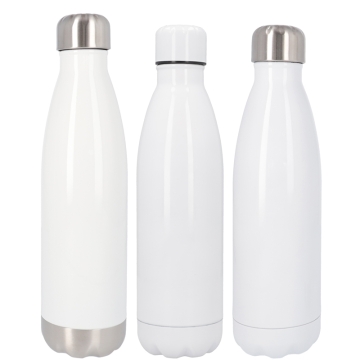
Sublimable Stainless Steel Drums
Sublimable Stainless Steel Drums
Customisable reusable water bottles by sublimation.
- Glossy white stainless steel, except Ref. 056382 (matte)
- 2 types of caps with screw closure and leak-proof silicone seal
More information
https://www.brildor.com/en/sublimable-stainless-steel-drums
52326
Sublimable Stainless Steel Drums
<p class="enlace"> </p>
<h2>More information about the Sublimable Stainless Steel Bottles</h2>
<p> </p>
<p><strong>INDEX</strong></p>
<p>> <a href="#know-more1">Description</a></p>
<p>> <a href="#know-more5">Things to keep in mind</a></p>
<p>> <a href="#know-more7">Characteristics</a></p>
<p>> <a href="#know-more2">Measurements</a></p>
<p>> <a href="#know-more6">Washing recommendations</a></p>
<p>> <a href="#know-more3">Recommended sublimation instructions and parameters</a></p>
<p>> <a href="#know-more4">Related posts</a></p>
<p> </p>
<p class="enlace"><a id="know-more1"></a> </p>
<p><strong>DESCRIPTION</strong></p>
<ul>
<li>Suitable for food consumption. They do not transfer flavour to the drink</li>
<li>Flat screw cap (Ref. 055294 and 056382) or dome (Ref. 038253 and 056445)</li>
<li>Mouth size suitable for easy refilling and cleaning of the bottle</li>
<li>All bottles have a glossy white sublimable coating, except Ref. 056382, which is matte<span style="color: #ff0000;"><br /></span></li>
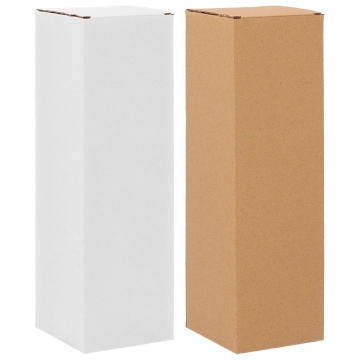
<li>White cardboard presentation box included</li>
<li>Food consumption label attached to the base of the bottle. Easily removable (Ref. 038253)</li>
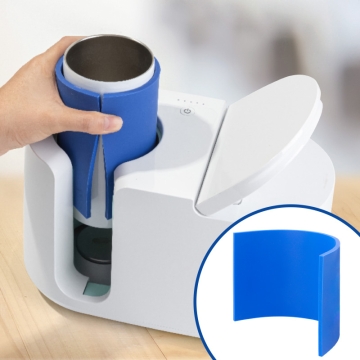
<li>You can personalise the cylindrical area of the bottle with a mug press or for cylindrical objects</li>
<li>They can also be personalised with other techniques such as <span class="azul-brildor-negrita">laser engraving, screen printing, adhesive vinyl, DTF</span> and <span class="azul-brildor-negrita">UV printing</span></li>
</ul>
<p> </p>
<p class="enlace"><a id="know-more5"></a> </p>
<p><strong>THINGS TO KEEP IN MIND</strong></p>
<ul>
<li>Cap is not sublimable</li>
<li>When sublimating with a press, keep the following in mind:
<ul>
<li>At the end of the pressing time, without removing the bottle from the press, rotate it and apply heat for <span class="azul-negrita">10 seconds</span> more</li>
<li>This will allow the part of the design that remains on the sides of the paper to transfer evenly, just like the central area of the design</li>
</ul>
</li>
<li>If there are residues on the surface after removing the sublimation paper, you can remove them with a soft damp cloth. The bottle must be <strong>completely cold</strong></li>
<li>Although the box of the bottle with flat cap Ref. 055294 indicates it is <span class="azul-negrita">750 ml</span>, its actual capacity is <span class="azul-negrita">650 ml</span></li>
<li>Although the interior is resistant to oxidation, it is not resistant to corrosion. Avoid keeping acidic, fermented, or carbonated drinks inside for more than 24 hours. It is recommended to wash it after each use</li>
</ul>
<p> </p>
<p class="enlace"><a id="know-more7"></a> </p>
<p><strong>CHARACTERISTICS</strong></p>
<table>
<tbody>
<tr>
<td><strong>Reference</strong></td>
<td style="text-align: center;"><strong>055294</strong></td>
<td style="text-align: center;"><strong>056382</strong></td>
<td style="text-align: center;"><strong>038253</strong></td>
<td style="text-align: center;"><strong>056445</strong></td>
</tr>
<tr>
<td><strong>Cap</strong></td>
<td style="text-align: center;">Flat <br />white</td>
<td style="text-align: center;">Flat <br />white</td>
<td style="text-align: center;">Dome<br />white</td>
<td style="text-align: center;">Dome<br />silver</td>
</tr>
<tr>
<td><strong>Coating finish</strong></td>
<td style="text-align: center;">Glossy</td>
<td style="text-align: center;">Matte</td>
<td style="text-align: center;">Glossy</td>
<td style="text-align: center;">Glossy</td>
</tr>
<tr>
<td><strong>Base design</strong></td>
<td style="text-align: center;">Flat</td>
<td style="text-align: center;">Flat with <br />rim</td>
<td style="text-align: center;">Flat with <br />rim</td>
<td style="text-align: center;">Flat with <br />rim</td>
</tr>
</tbody>
</table>
<p> </p>
<p class="enlace"><a id="know-more2"></a> </p>
<p><strong>MEASUREMENTS<br /></strong></p>
<table>
<tbody>
<tr>
<td><strong>Reference<br /></strong></td>
<td style="text-align: center;"><strong>055294</strong></td>
<td style="text-align: center;"><strong>056382<br /></strong></td>
<td style="text-align: center;"><strong>038253</strong></td>
<td style="text-align: center;"><strong>056445</strong></td>
</tr>
<tr>
<td><strong>Capacity (oz ≈ ml)<br /></strong></td>
<td style="text-align: center;"><span class="azul-negrita">23 ≈ 650</span></td>
<td style="text-align: center;"><span class="azul-negrita">25 ≈ 700</span></td>
<td class="azul-negrita" style="text-align: center;">25 ≈ 700</td>
<td style="text-align: center;"><span class="azul-negrita">25 ≈ 700</span></td>
</tr>
<tr>
<td><strong>Print area (cm)</strong></td>
<td style="text-align: center;"><span class="azul-negrita">22.5 x 11</span></td>
<td style="text-align: center;"><span class="azul-negrita">22.5 x 11</span></td>
<td class="azul-negrita" style="text-align: center;">22.5 x 12</td>
<td style="text-align: center;"><span class="azul-negrita">22.5 x 13</span></td>
</tr>
<tr>
<td><strong>Bottle (cm)<br /></strong></td>
<td style="text-align: center;"><span class="azul-negrita">Ø6.9 x 25.5</span></td>
<td style="text-align: center;"><span class="azul-negrita">Ø6.5 x 26.8</span></td>
<td class="azul-negrita" style="text-align: center;">Ø7 x 25.5</td>
<td style="text-align: center;"><span class="azul-negrita">Ø7 x 27.5</span></td>
</tr>
<tr>
<td><strong>Cap (cm)</strong></td>
<td style="text-align: center;"><span class="azul-negrita">Ø4.2 x 2.5</span></td>
<td style="text-align: center;"><span class="azul-negrita">Ø4.2 x 3</span></td>
<td class="azul-negrita" style="text-align: center;">Ø4.2 x 3</td>
<td style="text-align: center;"><span class="azul-negrita">Ø4.2 x 3</span></td>
</tr>
<tr>
<td><strong>Mouth (cm)</strong></td>
<td style="text-align: center;"><span class="azul-negrita">Ø3.4 x 2.1</span></td>
<td style="text-align: center;"><span class="azul-negrita">Ø3.4 x 1.9</span></td>
<td class="azul-negrita" style="text-align: center;">Ø3.5 x 1.9</td>
<td style="text-align: center;"><span class="azul-negrita">Ø3.4 x 2.1</span></td>
</tr>
</tbody>
</table>
<p> </p>
<p class="enlace"><a id="know-more6"></a> </p>
<p><strong>WASHING RECOMMENDATIONS</strong></p>
<ul>
<li>Not suitable for use in dishwashers or microwaves</li>
<li>Hand wash with warm water and soap</li>
<li>Dry properly after each wash</li>
</ul>
<p> </p>
<p class="enlace"><a id="know-more3"></a> </p>
<p><strong>RECOMMENDED SUBLIMATION INSTRUCTIONS AND PARAMETERS</strong></p>
<p>Parameters indicated as <strong>guidelines</strong>. It is recommended to conduct prior tests to make necessary adjustments before starting production.<strong><br /></strong></p>
<p><strong>WITH MUG PRESS</strong></p>
<ul>
<li>Print the design in <strong>mirror mode</strong></li>
<li>Heat the press to <span class="azul-negrita">180 ºC</span></li>
<li>Remove the cap from the bottle</li>
<li>Place the printed part of the paper on the bottle and secure them with heat-resistant tape</li>
<li>Insert the bottle into the press</li>
<li>Close the press with <strong>medium pressure</strong> for <span class="azul-negrita">60 seconds</span></li>
<li>After the pressing time, rotate the bottle without removing it from the press and apply heat for <span class="azul-negrita">10 seconds</span> more</li>
<li>With the help of a protective glove, remove the freshly printed bottle</li>
<li>Carefully remove the paper</li>
</ul>
<p><strong>WITH SUBLIMATION OVEN<br /></strong></p>
<ul>
<li>Print the design in <strong>mirror mode</strong></li>
<li>Heat the oven to <span class="azul-negrita">180 ºC</span></li>
<li>Remove the cap from the bottle</li>
<li>Place the printed design around the bottle and secure them with heat-resistant tape</li>
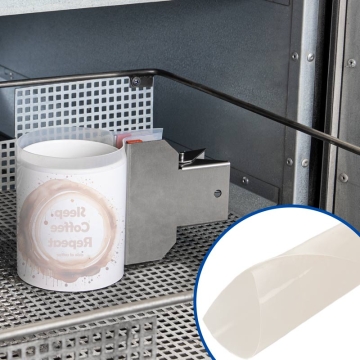
<li>Place and adjust the clamp or, insert the bottle into a heat shrink bag and shrink with the gun. You can also use a silicone sheet</li>
<li>Sublimate in the oven for <span class="azul-negrita">6 minutes</span></li>
<li>With the help of a protective glove, remove the clamp, silicone sheet, or bag, as applicable</li>
<li>Carefully remove the paper from the bottle</li>
</ul>
<p> </p>
<p class="enlace"><a id="know-more4"></a> </p>
<p><strong>RELATED POSTS</strong></p>
<p><a title="Oven sublimation using heat shrink bags" href="https://www.brildor.com/blog/en/oven-sublimation-using-heat-shrink-bags/" target="_blank" rel="nofollow noopener">Oven sublimation using heat shrink bags</a></p>
https://www.brildor.com/media/catalog/product/b/i/bidones-acero-inox-sublimable-d17.jpg
4.95
instock
0
4.95
0
0
0
https://www.brildor.com/media/catalog/product/b/i/bidones-acero-inox-sublimable-d17.jpg
20392
25580
27659
50138
51294
51693
53915
/BLANKS
/BLANKS/Water Bottles & Flasks
/BLANKS/Water Bottles & Flasks/Water Bottles
2024-07-02T13:01:20+0000
