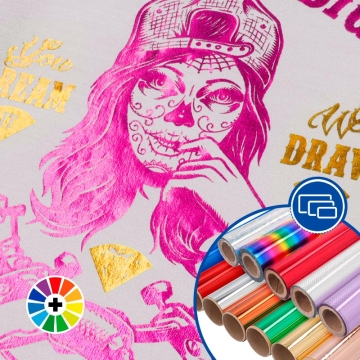
We R Foil Quill Thermal Pens and Foil Kit
We R Foil Quill Thermal Pens and Foil Kit
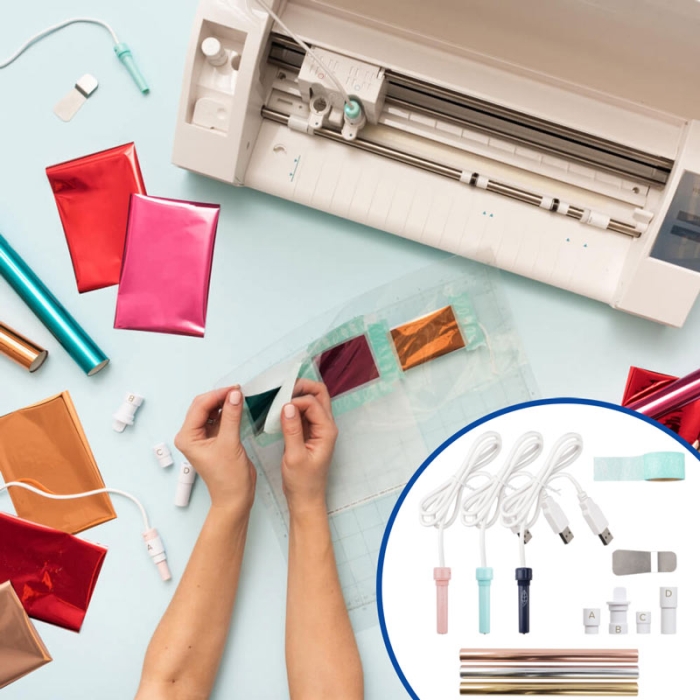
Foil Quill Kit with 3 heat pens to create all kinds of foil designs through heat embossing.
Compatible with cutting plotters: Silhouette, Cricut, Brother, and Sizzix.
- Suitable for paper, cardstock, vinyl, acetate, parchment, fabric, leather, and wood
- Including adapters, foil and tape
- You can purchase replacement nibs separately
More information
https://www.brildor.com/en/we-r-foil-quill-thermal-pens-foil-kit
51321
We R Foil Quill Thermal Pens and Foil Kit
<p><a name="know-more"></a></p>
<h2>More information about the We R Thermal Pens and Foil Kit</h2>
<p> </p>
<p><strong>INDEX</strong></p>
<p>> <a href="#know-more1">Description</a></p>
<p>> <a href="#know-more8">Things to keep in mind</a></p>
<p>> <a href="#know-more5">Precautions</a></p>
<p>> <a href="#know-more2">What does the Thermal Pens Kit include?</a></p>
<p>> <a href="#know-more6">Adapter Compatibility</a></p>
<p>> <a href="#know-more4">Tips and Tricks</a></p>
<p>> <a href="#know-more3">Thermal Pen Usage Instructions</a></p>
<p> </p>
<p class="enlace"><a id="know-more1"></a> </p>
<p><strong>DESCRIPTION</strong></p>
<ul>
<li>The pen applies foil to the material using pressure and heat, with a clean finish even on highly detailed designs</li>
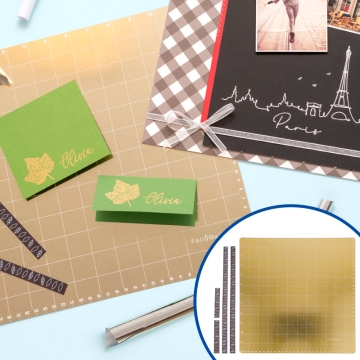
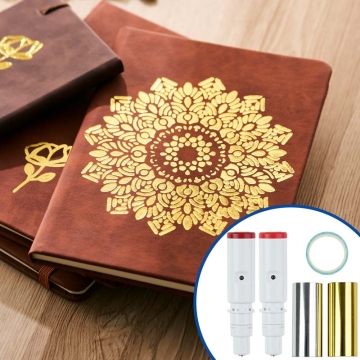
<li>Ideal for personalising boxes, invitations, labels, stickers, cards…</li>
<li>The kit includes three tip sizes: fine, standard, and thick</li>
<li>The adapters allow the thermal pens to be used with various brands of plotters</li>
</ul>
<p> </p>
<p class="enlace"><a id="know-more8"></a> </p>
<p><strong>THINGS TO KEEP IN MIND</strong></p>
<ul>
<li>If you use other brands of foil such as <a href="https://www.brildor.com/en/heidi-swapp-minc-foil-305mmx3m-roll" target="_blank" rel="noopener">Heidi Swapp's Minc</a>, perform preliminary tests. We do not know the compatibility of the kit with this foil</li>
</ul>
<p> </p>
<p class="enlace"><a id="know-more5"></a> </p>
<p><strong>PRECAUTIONS</strong></p>
<ul>
<li>Ensure to disconnect the thermal pen when not in use</li>
<li>Do not leave the pen unattended while it is on</li>
<li>Avoid touching the metal parts when in use, as they can cause burns</li>
<li>Wait until the pen has completely cooled down before handling it</li>
<li>Do not immerse the pen in water or other liquids, as there is a risk of electric shock</li>
</ul>
<p> </p>
<p class="enlace"><a id="know-more2"></a> </p>
<p><strong>WHAT DOES THE THERMAL PENS KIT INCLUDE?</strong></p>
<table>
<tbody>
<tr>
<td><span class="azul-negrita">1</span></td>
<td>Fine thermal pen of <span class="azul-negrita">0.5 mm</span></td>
</tr>
<tr>
<td><span class="azul-negrita">1</span></td>
<td>Standard thermal pen of <span class="azul-negrita">1.5 mm</span></td>
</tr>
<tr>
<td><span class="azul-negrita">1</span></td>
<td>Thick thermal pen of <span class="azul-negrita">2.5 mm</span></td>
</tr>
<tr>
<td><span class="azul-negrita">1</span></td>
<td>Adapter for Silhouette plotters (A)</td>
</tr>
<tr>
<td><span class="azul-negrita">1</span></td>
<td>Adapter for Brother plotters (B)</td>
</tr>
<tr>
<td><span class="azul-negrita">1</span></td>
<td>Adapter for Cricut plotters (C)</td>
</tr>
<tr>
<td><span class="azul-negrita">1</span></td>
<td>Adapter for Sizzix plotters (D)</td>
</tr>
<tr>
<td><span class="azul-negrita">1</span></td>
<td>Gold Foil Heat Transfer Sheet - Roll of <span class="azul-negrita">150 mm</span></td>
</tr>
<tr>
<td><span class="azul-negrita">1</span></td>
<td>Rose Gold Foil Heat Transfer Sheet - Roll of <span class="azul-negrita">150 mm</span></td>
</tr>
<tr>
<td><span class="azul-negrita">1</span></td>
<td>Silver Foil Heat Transfer Sheet - Roll of <span class="azul-negrita">150 mm</span></td>
</tr>
<tr>
<td><span class="azul-negrita">1</span></td>
<td>Adhesive tape</td>
</tr>
<tr>
<td><span class="azul-negrita">1</span></td>
<td>Heat-resistant plate</td>
</tr>
<tr>
<td><span class="azul-negrita">1</span></td>
<td>Instruction manual</td>
</tr>
</tbody>
</table>
<p class="enlace"> </p>
<p class="enlace"><a id="know-more6"></a> </p>
<p><strong>ADAPTER COMPATIBILITY</strong></p>
<table>
<tbody>
<tr>
<td style="text-align: center;"><strong>Adapter</strong></td>
<td style="text-align: center;"><strong>Plotter</strong></td>
<td style="text-align: center;"><strong>Model</strong></td>
<td><strong>Carriage or Head<br /></strong></td>
</tr>
<tr>
<td style="text-align: center;" rowspan="6"><strong>A</strong></td>
<td style="text-align: center;" rowspan="6">Silhouette</td>
<td style="text-align: center;">Cameo 1</td>
<td style="text-align: center;" rowspan="6">1</td>
</tr>
<tr>
<td style="text-align: center;">Cameo 2</td>
</tr>
<tr>
<td style="text-align: center;">Cameo<sup> </sup>3</td>
</tr>
<tr>
<td style="text-align: center;">Portrait</td>
</tr>
<tr>
<td style="text-align: center;">Portrait 2</td>
</tr>
<tr>
<td style="text-align: center;">Curio</td>
</tr>
<tr>
<td style="text-align: center;" rowspan="3"><strong>B </strong></td>
<td style="text-align: center;" rowspan="3">
<p>Brother</p>
</td>
<td style="text-align: center;">Brother ScanNCut DX</td>
<td style="text-align: center;" rowspan="3">1</td>
</tr>
<tr>
<td style="text-align: center;">
<p>Brother ScanNCut <sup>(*)</sup></p>
</td>
</tr>
<tr>
<td style="text-align: center;">Brother DesignNcut (DC200)</td>
</tr>
<tr>
<td style="text-align: center;" rowspan="8"><strong>C </strong></td>
<td style="text-align: center;" rowspan="4">Cricut</td>
<td style="text-align: center;">Maker</td>
<td style="text-align: center;" rowspan="8">1</td>
</tr>
<tr>
<td style="text-align: center;">Explore One</td>
</tr>
<tr>
<td style="text-align: center;">Explore Air</td>
</tr>
<tr>
<td style="text-align: center;">Explore Air 2</td>
</tr>
<tr>
<td rowspan="4">Silhouette</td>
<td style="text-align: center;">Cameo 4 <sup>(**)</sup></td>
</tr>
<tr>
<td style="text-align: center;">Cameo 4 Plus</td>
</tr>
<tr>
<td style="text-align: center;">Cameo 4 Pro</td>
</tr>
<tr>
<td style="text-align: center;">Portrait 3<sup>(**)</sup></td>
</tr>
<tr>
<td style="text-align: center;" rowspan="2"><strong>D </strong></td>
<td style="text-align: center;" rowspan="2">Sizzix</td>
<td style="text-align: center;">Eclips 1</td>
<td style="text-align: center;" rowspan="2">2</td>
</tr>
<tr>
<td style="text-align: center;">Eclips 2</td>
</tr>
</tbody>
</table>
<p><sup>(*)</sup> <span style="font-size: small;">CM650WX, CM350, CM100DM, SDX125, SDX225, SDX125i</span></p>
<p><sup>(**)</sup> Cameo 4 and Portrait 3 models require the <a href="https://www.brildor.com/en/tool-adapter-set-silhouette" target="_blank" rel="noopener">blue Silhouette adapter</a> which must be purchased separately (<strong>Ref. 040005</strong>)</p>
<p> </p>
<p class="enlace"><a id="know-more4"></a> </p>
<p><strong>TIPS AND TRICKS</strong></p>
<ul>
<li>To use the kit with Cameo 4, use the C adapter along with the blue Silhouette adapter. Before placing it in the tool holder, make sure to adjust the pen height using a blade as a reference to ensure the pen makes contact with the material</li>
<li>Complement this personalisation technique with others such as <span class="azul-brildor-negrita">screen printing</span>, <span class="azul-brildor-negrita">sublimation</span>, <span class="azul-brildor-negrita">heat transfer base</span>, or <span class="azul-brildor-negrita">embossing</span></li>
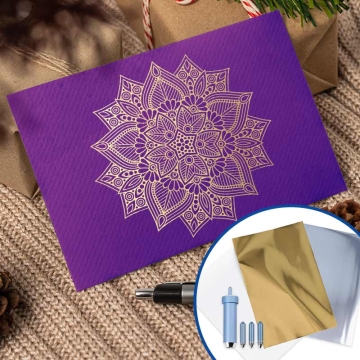
<li>Use stencil templates to reproduce drawings and patterns like mandalas, symbols, logos, prints...</li>
<li>Mark the foil with a stamp, trace it, or go over it to get a perfect design</li>
</ul>
<p> </p>
<p class="enlace"><a id="know-more3"></a> </p>
<p><strong>THERMAL PEN USAGE INSTRUCTIONS</strong></p>
<ul>
<li>Place the adapter according to your plotter on your Foil Quill pen</li>
<li>Position the Foil Quill thermal pen in the tool holder</li>
<li>Connect the USB to a power source</li>
<li>Place the machine at a distance of <span class="azul-negrita">61 cm</span> from the power source to allow the cable length to adapt to the machine's movement</li>
<li>Once connected, the pen will light up</li>
<li>Place the heat-resistant plate under the thermal pen to avoid damage</li>
<li>Let the pen heat up for <span class="azul-negrita">5 minutes</span></li>
<li>Meanwhile, you can set up the design you want to create</li>
<li>Position the material to be personalised on your plotter's cutting mat</li>
<li>Cut the foil for your design with a margin of approximately <span class="azul-negrita">2.5 cm</span> on all edges</li>
<li>Attach the adhesive tape to the edges of the foil to secure it to the material</li>
<li>Ensure the foil is well-stretched and send the design to the plotter</li>
</ul>
<p> </p>
https://www.brildor.com/media/catalog/product/k/i/kit-plumas-termicas-foil-we-r-d7.jpg
59.9
instock
0
59.9
0
0
0
https://www.brildor.com/media/catalog/product/k/i/kit-plumas-termicas-foil-we-r-d7.jpg
27642
43637
44643
51312
/Vinyl Cutters
/Vinyl Cutters/Silhouette
/Vinyl Cutters/Cricut
/Arts & Crafts
/Arts & Crafts/We R Memory Keepers
/Vinyl Cutters/Silhouette/Accessories & Consumables
/Vinyl Cutters/Cricut/Accessories & Consumables
/Arts & Crafts/Tools & Accessories
2024-01-11T08:10:42+0000
