Wrought Iron Shelf with 3 Sublimation Tiles
Wrought Iron Shelf with 3 Sublimation Tiles
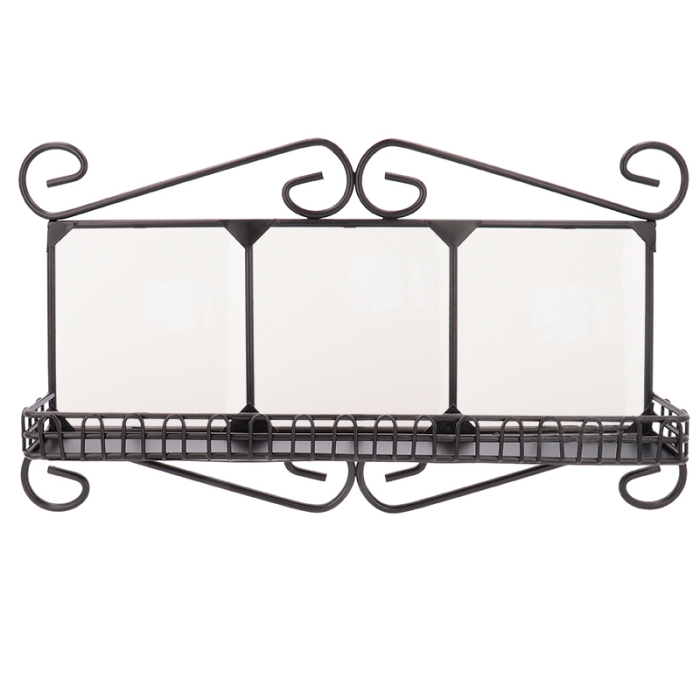
Wrought iron shelf with printable tiles using dye sublimation printing.
- Solid wrought iron shelf with black railing
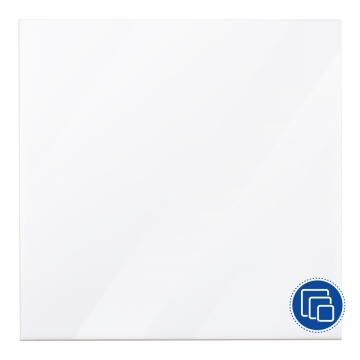
- Includes 3 white gloss ceramic tiles
- Print area (per tile): 10.8 x 10.8 cm
More information
-
5 for
€9.41
each
-
50 for
€8.91
each
-
150 for
€7.92
each
-
5 for
€9.41
each
-
50 for
€8.91
each
-
150 for
€7.92
each
https://www.brildor.com/en/wrought-iron-shelf-with-3-tiles-for-sublimation
28024
Wrought Iron Shelf with 3 Sublimation Tiles
<p class="enlace"><a id="saber-mas"></a> </p>
<h2>More information about the Wrought Iron Shelf with 3 Sublimation Tiles</h2>
<p> </p>
<p><strong>INDEX</strong></p>
<p>> <a href="#saber-mas1">Description</a></p>
<p>> <a href="#saber-mas2">Things to keep in mind</a></p>
<p>> <a href="#saber-mas3">Dimensions (approx.)</a></p>
<p>> <a href="#saber-mas4">Recommended instructions and parameters for sublimation printing</a></p>
<p style="padding-left: 40px;"><span style="color: #212529; font-family: cabin; font-size: 16px; font-style: normal; font-variant-ligatures: normal; font-variant-caps: normal; font-weight: 400; letter-spacing: normal; orphans: 2; text-align: start; text-indent: 0px; text-transform: none; widows: 2; word-spacing: 0px; -webkit-text-stroke-white-space: normal; background-color: #ffffff; text-decoration-thickness: initial; text-decoration-style: initial; text-decoration-color: initial; display: inline !important; float: none;">›</span> <a href="#saber-mas5">With a heat press - Direct method</a></p>
<p style="padding-left: 40px;"><span style="color: #212529; font-family: cabin; font-size: 16px; font-style: normal; font-variant-ligatures: normal; font-variant-caps: normal; font-weight: 400; letter-spacing: normal; orphans: 2; text-align: start; text-indent: 0px; text-transform: none; widows: 2; word-spacing: 0px; -webkit-text-stroke-white-space: normal; background-color: #ffffff; text-decoration-thickness: initial; text-decoration-style: initial; text-decoration-color: initial; display: inline !important; float: none;">›</span> <a href="#saber-mas6">With a heat press - Indirect method</a></p>
<p style="padding-left: 40px;"><span style="color: #212529; font-family: cabin; font-size: 16px; font-style: normal; font-variant-ligatures: normal; font-variant-caps: normal; font-weight: 400; letter-spacing: normal; orphans: 2; text-align: start; text-indent: 0px; text-transform: none; widows: 2; word-spacing: 0px; -webkit-text-stroke-white-space: normal; background-color: #ffffff; text-decoration-thickness: initial; text-decoration-style: initial; text-decoration-color: initial; display: inline !important; float: none;">›</span> <a href="#saber-mas7">With a </a><a href="#saber-mas7">sublimation oven</a></p>
<p> </p>
<p class="enlace"><a id="saber-mas1"></a> </p>
<p><strong>DESCRIPTION<br></strong></p>
<ul>
<li>Perfect as spice rack, in the balcony and porch with small plants and much more</li>
<li>Very useful as a display shelf for brochures or cards in shops, petrol stations and shops</li>
<li>Decorates and adds to the space by providing additional storage area</li>
<li>Arabesque style. Brings a rustic look where it is placed</li>
<li>Easy to place and remove the tiles. They are held in place with foldable tabs</li>
<li>In <strong>Related Products</strong> you will find spare tiles for the shelf (Ref. 000083 and Ref. 036899)</li>
</ul>
<p> </p>
<p class="enlace"><a id="saber-mas2"></a> </p>
<p><strong>THINGS TO KEEP IN MIND</strong></p>
<ul>
<li>You can sublimate these tiles with a flat press using either the <strong>direct method</strong> or the <strong>indirect method</strong>. We recommend testing to determine which of these methods gives the highest quality print. It will also allow you to adjust the sublimation parameters</li>
<li>It is important to follow the colour profile guidelines of each ink manufacturer</li>
</ul>
<p> </p>
<p class="enlace"><a id="saber-mas3"></a> </p>
<p><strong>DIMENSIONS (APPROX.)</strong></p>
<table>
<tbody>
<tr>
<td><strong>Shelf (cm)<br></strong></td>
<td style="text-align: left;"><span class="azul-negrita">38,6 x 20,8 x 5,5 cm<br></span></td>
</tr>
<tr>
<td><strong>Tile (cm)<br></strong></td>
<td style="text-align: left;"><span class="azul-negrita">10,8 x 10,8 x 10,8 x 0,5<br></span></td>
</tr>
<tr>
<td><strong>Shelf (cm)<br></strong></td>
<td style="text-align: left;"><span class="azul-negrita">34.5 x 2.5 x 5.5 x 5.5<br></span></td>
</tr>
<tr>
<td><strong>Print area per tile (cm)<br></strong></td>
<td class="azul-negrita" style="text-align: left;">10,8 x 10,8</td>
</tr>
<tr>
<td><strong>Weight (g)<br></strong></td>
<td class="azul-negrita" style="text-align: left;">857</td>
</tr>
</tbody>
</table>
<p> </p>
<p class="enlace"><a id="saber-mas4"></a> </p>
<p><strong>RECOMMENDED INSTRUCTIONS AND PARAMETERS FOR SUBLIMATION PRINTING</strong></p>
<p class="enlace"><a id="saber-mas5"></a> </p>
<p><strong>WITH A HEAT PRESS (DIRECT METHOD)</strong></p>
<ul>
<li>Print the design in <strong> mirror image</strong></li>
<li>Preheat the press to <span class="azul-negrita">180</span><span class="azul-negrita">ºC</span></li>
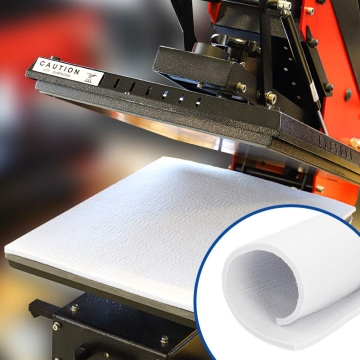
<li>Use a Nomex pad on the lower platen of the press to achieve an even heat distribution</li>
<li>Place the printed paper on the tile and stick it with heat-resistant tape. Place the tile with the printable side side up on the press</li>
<li>Press for <span class="azul-negrita">180 seconds</span>, <strong>medium-high pressure</strong></li>
<li>Remove the freshly printed tile with the help of a protective glove</li>
<li>Peel off the paper carefully</li>
</ul>
<p class="enlace"><a id="saber-mas6"></a> </p>
<p><strong><strong>WITH A HEAT PRESS (INDIRECT METHOD)<br></strong></strong></p>
<ul>
<li>Print the design in<strong> mirror image</strong></li>
<li>Preheat the press to <span class="azul-negrita">180</span><span class="azul-negrita">ºC</span></li>
<li>Use a Nomex pad on the lower platen of the press to achieve an even heat distribution</li>
<li>Place the printed paper on the tile and stick it with heat-resistant tape. Place the tile with the printable side side down on the press</li>
<li>Press for <span class="azul-negrita">700 seconds</span>, <strong>medium-high pressure</strong><span class="azul-negrita"><br></span></li>
<li>With the help of a protective glove, remove the freshly printed tile</li>
<li>Peel off the paper carefully</li>
</ul>
<p class="enlace"><a id="saber-mas7"></a> </p>
<p><strong>WITH A SUBLIMATION OVEN<br></strong></p>
<ul>
<li>Print in <strong>mirror image</strong> the design you want to print on the tile</li>
<li>Preheat the oven to <span class="azul-negrita">175ºC</span></li>
<li>Place the printed design face down on the white part of the tile and fix it with heat-resistant tape</li>
<li>If using a 3D oven, place the tile with the printable side facing upwards. Close the membrane and make the vacuum. Make sure no air bubbles remain on the surface</li>
<li>Another option is to use heat shrink bags. With the help of a heat gun, shrink the design to the tile, removing all the air from inside the tile</li>
<li>Close the oven and bake for <span class="azul-negrita">13 minutes</span><span class="azul-negrita"><br></span></li>
<li>Open the oven and remove the sublimated tile with the help of a protective glove</li>
<li>Peel off the paper carefully</li>
</ul>
https://www.brildor.com/media/catalog/product/r/e/repisa-de-forja-con-3-azulejos-para-sublimacion-d8.jpg
9.9
instock
9.9
9.9
0
0
0
0
0
https://www.brildor.com/media/catalog/product/r/e/repisa-de-forja-con-3-azulejos-para-sublimacion-d8.jpg
14084
22929
24416
24659
43672
/BLANKS
/BLANKS/Tiles
/BLANKS/Ceramic
2021-07-24T05:58:36+0000

