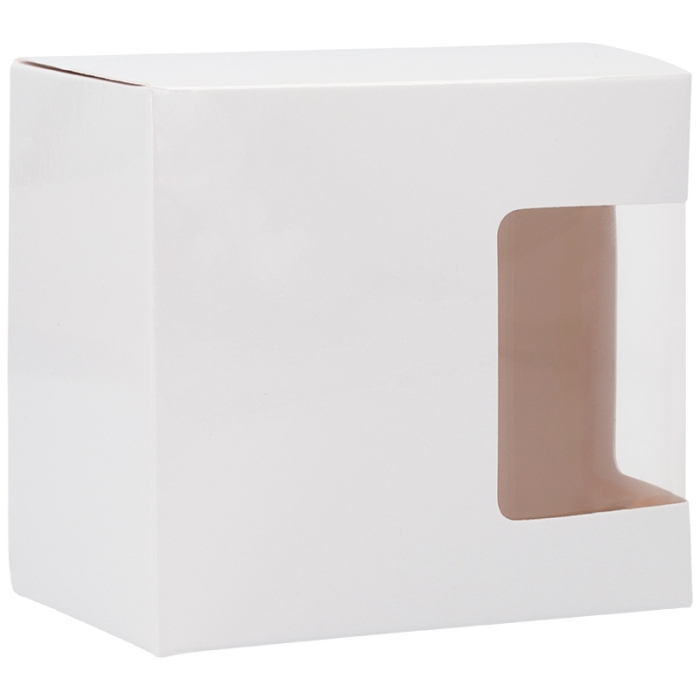
Window covered with acetate clear on the front and right side of the box. It allows to view the mug from two different angles
Easy to mount. The plastic window film includes adhesive to fix it to the window after sublimation cardstock after sublimation
No staples, glue or adhesives required adhesive tape
THINGS TO KEEP IN MIND
Does not include mug
The acetate window protection must be placed on the window after sublimation box after sublimation
The side of the card stock to be sublimated is distinguishable from the other side because it has adhesive on one of the tabs (the one used to mount the window box). The adhesive is covered with protective paper
RECOMMENDED INSTRUCTIONS AND PARAMETERS FOR SUBLIMATION PRINTING
Print the design in mode mirror
Preheat the press to 175 °C
Pre-press the cardstock the oven upside down for 10 seconds to remove the humidity
Place the cardstock of the box on the press with the printable side up and the printed side of the paper on top of it. Fix it with thermal adhesive tape
Close the press with medium pressure for 70-80 seconds
With the help of a protective glove, remove the newly printed cardstock the freshly sublimated
https://www.brildor.com/en/sublimation-box-plastic-window-mug25505Sublimation Box with Plastic Window for Mug - Pack of 10 units<p><a name="saber-mas"></a></p>
<h2>More information about the Sublimation Box with Plastic Window for Mug</h2>
<p> </p>
<p><strong>INDEX</strong></p>
<p>> <a href="#saber-mas1">Description</a></p>
<p>> <a href="#saber-mas2">Things to keep in mind</a></p>
<p>> <a href="#saber-mas3">Template to personalise</a></p>
<p>> <a href="#saber-mas4">Dimensions</a></p>
<p>> <a href="#saber-mas5">Recommended instructions and parameters for sublimation printing</a></p>
<p>> <a href="#saber-mas6">Related posts</a></p>
<p> </p>
<p class="enlace"><a id="saber-mas1"></a> </p>
<p class="enlace"><strong>DESCRIPTION</strong></p>
<ul>
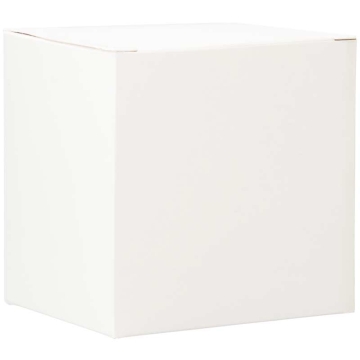
<li>From white both outside and inside</li>
<li>Window covered with acetate clear on the front and right side of the box. It allows to view the mug from two different angles</li>
<li>Easy to mount. The plastic window film includes adhesive to fix it to the window after sublimation cardstock after sublimation</li>
<li>No staples, glue or adhesives required adhesive tape</li>
</ul>
<p> </p>
<p class="enlace"><a id="saber-mas2"></a> </p>
<p><strong>THINGS TO KEEP IN MIND</strong></p>
<ul>
<li>Does not include mug</li>
<li>The acetate window protection must be placed on the window after sublimation box after sublimation</li>
<li>The side of the card stock to be sublimated is distinguishable from the other side because it has<strong> adhesive</strong> on one of the tabs (the one used to mount the window box). The adhesive is covered with protective paper</li>
</ul>
<p class="enlace"><a id="saber-mas3"></a> </p>
<p><strong>TEMPLATE FOR PERSONALISATION</strong></p>
<p><a title="Plantilla caja forrada de fieltro sublimable con ventana para taza (.pdf - 226 MB)" href="https://www.brildor.com/media/upload/descargas/Plantilla_Brildor_caja_taza_fieltro_sublimable_ventana_Ref_034190.pdf" target="_blank" rel="nofollow noopener">Template box template with plastic window for mug (.pdf - 226 MB)</a></p>
<p> </p>
<p class="enlace"><a id="saber-mas4"></a> </p>
<p><strong>DIMENSIONS</strong></p>
<table>
<tbody>
<tr>
<td><strong>Assembled box (cm)</strong></td>
<td class="azul-negrita">10.2 x 10.6 x 10.2</td>
</tr>
<tr>
<td><strong>Window - Front view (cm)</strong></td>
<td class="azul-negrita">6 x 7.5</td>
</tr>
<tr>
<td><strong>Window - Side view (cm)</strong></td>
<td class="azul-negrita">6 x 7.5</td>
</tr>
<tr>
<td><strong>Unassembled box - Die-cut sheet (cm)</strong></td>
<td class="azul-negrita">20.5 x 28.7</td>
</tr>
<tr>
<td><strong>Pack (cm)</strong></td>
<td class="azul-negrita">20.5 x 28.7 x 1.5</td>
</tr>
<tr>
<td><strong>Weight of pack (kg)</strong></td>
<td class="azul-negrita">0.24</td>
</tr>
</tbody>
</table>
<p> </p>
<p class="enlace"><a id="saber-mas5"></a> </p>
<p><strong>RECOMMENDED INSTRUCTIONS AND PARAMETERS FOR SUBLIMATION PRINTING</strong></p>
<ul>
<li>Print the design in <strong>mode</strong> <strong> mirror</strong></li>
<li>Preheat the press to <span class="azul-negrita">175 °C</span></li>
<li>Pre-press the cardstock the oven <strong>upside down</strong> for<span class="azul-negrita"> 10 seconds </span>to remove the humidity</li>
<li>Place the cardstock of the box on the press with the printable side up and the printed side of the paper on top of it. Fix it with thermal adhesive tape</li>
<li>Close the press with <strong>medium pressure</strong> for <span class="azul-negrita">70-80 seconds</span></li>
<li>With the help of a protective glove, remove the newly printed cardstock the freshly sublimated</li>
<li>Carefully peel off the paper</li>
</ul>
<p> </p>
<p class="enlace"><a id="saber-mas6"></a> </p>
<p><strong>RELATED POSTS</strong></p>
<p><a title="Cajas para tazas personalizadas: mejora la experiencia y vende más" href="https://www.brildor.com/blog/es/cajas-tazas-personalizadas-mejora-experiencia-vende-mas/" target="_blank" rel="nofollow noopener">Boxes for mugs personalised: enhance the experience and sell more</a></p>
<p><a href="https://www.brildor.com/blog/es/como-hacer-packaging-con-papeleria-creativa/" target="_blank" rel="noopener">How to make packaging with creative stationery</a></p>https://www.brildor.com/media/catalog/product/c/a/caja-individual-taza-ventana-plastico.jpg9.9instock9.99.900000https://www.brildor.com/media/catalog/product/c/a/caja-individual-taza-ventana-plastico.jpg1655519185223182394624200/Blanks/Blanks/Mugs/Packaging/Packaging/Embalajes para Tazas/Blanks/Mugs/Mug Boxes2021-07-24T05:33:12+0000