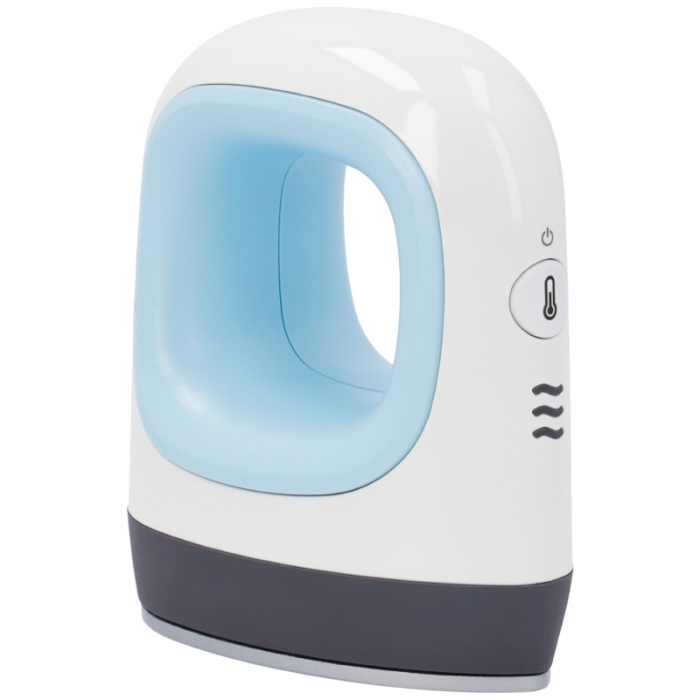
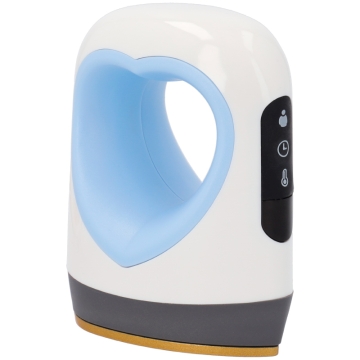
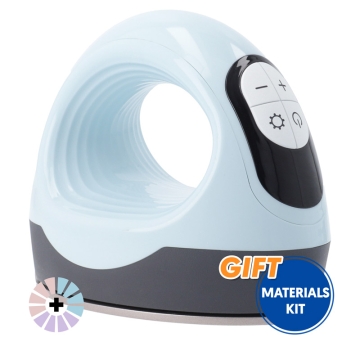
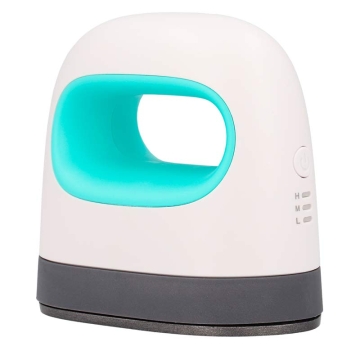
Cricut EasyPress 3 Mini Heat Press
Cricut EasyPress 3 Mini Heat Press
Transfer press with a pointed heat plate.
Ideal for customising difficult areas, such as small or irregular surfaces.
- 3 pre-set temperatures
- Includes an insulating base for placement when not in use
- Heat plate dimensions: 5 x 8.3 cm
- Purchase the compatible protective cover separately
More information
https://www.brildor.com/en/cricut-easypress-3-mini-heat-press
54230
Cricut EasyPress 3 Mini Heat Press
<p class="enlace"> </p>
<h2>More information about the Cricut EasyPress 3 Mini Heat Press</h2>
<p> </p>
<p><strong>INDEX</strong></p>
<p>> <a href="#know-more1">Description</a></p>
<p>> <a href="#know-more2">Things to keep in mind</a></p>
<p>> <a href="#know-more9">Recommendations</a></p>
<p>> <a href="#know-more3">Preset ironing programmes</a></p>
<p>> <a href="#know-more4">Instructions for use</a></p>
<p>> <a href="#know-more7">Protective case</a></p>
<p>> <a href="#know-more5">Technical data</a></p>
<p>> <a href="#know-more6">Iron dimensions</a></p>
<p>> <a href="#know-more8">Case dimensions</a></p>
<p>> <a href="#know-more10">Warranty</a></p>
<p> </p>
<p class="enlace"><a id="know-more1"></a> </p>
<p><strong>DESCRIPTION</strong></p>
<ul>
<li>Ideal for personalising using heat-required techniques such as <span class="azul-brildor-negrita">sublimation</span>, <span class="azul-brildor-negrita">transfer</span>, <span class="azul-brildor-negrita">vinyl</span>...</li>
<li>3 preset ironing temperatures with light indicators: low (one bar), medium (two bars), and high (three bars)</li>
<li>Ceramic-coated heat plate, drop-shaped for accessing difficult areas</li>
<li>Automatic shut-off after <span class="azul-negrita">10 min</span> of inactivity</li>
<li>Small, lightweight, and portable heat press</li>
<li>Ergonomic handle</li>
<li>CE certification ensuring this press meets the technical requirements in the European Union</li>
</ul>
<p> </p>
<p class="enlace"><a id="know-more2"></a> </p>
<p><strong>THINGS TO KEEP IN MIND</strong></p>
<ul>
<li>The protective case is sold separately</li>
</ul>
<p> </p>
<p class="enlace"><a id="know-more9"></a> </p>
<p><strong>RECOMMENDATIONS</strong></p>
<ul>
<li>Materials must be completely dry. If you think they may be damp, pre-iron them</li>
<li>During transfer, continuously move the press over the design, including the centre and edges, extending about <span class="azul-negrita">13 mm</span> beyond</li>
<li>When transferring onto hollow irregular shapes like hats or shoes, fill them or use an appropriate support. Ensure the surface is firm enough to facilitate ironing, prevent wrinkles, and distribute heat evenly</li>
<li>Place the press on the insulated safety base when not in use</li>
<li>Keep away from children and use with caution</li>
</ul>
<p> </p>
<p class="enlace"><a id="know-more3"></a> </p>
<p><strong>PRESET IRONING PROGRAMMES<br></strong></p>
<table>
<tbody>
<tr>
<td><strong>Temperature</strong></td>
<td style="text-align: center;">Low</td>
<td style="text-align: center;">Medium</td>
<td style="text-align: center;">High</td>
</tr>
<tr>
<td><strong>Light indicator on</strong></td>
<td style="text-align: center;">1 bar</td>
<td style="text-align: center;">2 bars</td>
<td style="text-align: center;">3 bars</td>
</tr>
<tr>
<td><strong>Degrees</strong></td>
<td style="text-align: center;"><span class="azul-negrita">125-145 ºC<br></span></td>
<td style="text-align: center;"><span class="azul-negrita">150-175 ºC<br></span></td>
<td style="text-align: center;"><span class="azul-negrita">180-205 ºC<br></span></td>
</tr>
</tbody>
</table>
<p> </p>
<p class="enlace"><a id="know-more4"></a> </p>
<p><strong>INSTRUCTIONS FOR USE<br></strong></p>
<ol>
<li>Connect the press to the power supply</li>
<li>Turn it on by pressing the <strong>on/off button</strong> (thermometer icon)<span class="azul-negrita"><br></span></li>
<li>Select the desired temperature (low, medium, or high) by pressing the button with the thermometer icon</li>
<li>Wait for the light indicator(s) to change from orange to green</li>
<li>Iron for the time indicated for the material. You can access <a title="Cricut" href="https://cricut.com/heatguide" target="_blank" rel="nofollow noopener">Cricut</a> to help with the parameters for each material</li>
<li>Move the press over the design maintaining even pressure</li>
<li>Press and hold the <strong>on/off button</strong> (thermometer icon) until a beep is heard to turn off the press</li>
</ol>
<p> </p>
<p class="enlace"><a id="know-more7"></a> </p>
<p><strong>PROTECTIVE CASE</strong></p>
<ul>
<li>Rigid case <strong>compatible</strong> with the GP-1 Mini, Cricut EasyPress 3 Mini transfer press and its previous, now <span class="rojo-negrita">discontinued</span> model (Ref. 038668)</li>
<li>Black plastic exterior resistant to impacts, scratches, splashes, and dust. Soft velvet-lined interior</li>
<li>With zip closure and hand strap for easy transport</li>
<li>Internal mesh pocket for storing small accessories</li>
<li>Includes a velcro strap for organising cables</li>
</ul>
<p> </p>
<p class="enlace"><a id="know-more5"></a> </p>
<p><strong>TECHNICAL DATA<br></strong></p>
<table>
<tbody>
<tr>
<td>Iron model</td>
<td>Cricut EasyPress 3 Mini</td>
</tr>
<tr>
<td>Type of iron</td>
<td>Manual</td>
</tr>
<tr>
<td>Heat plate dimensions</td>
<td><span class="azul-negrita"><strong>5 x 8.3</strong> cm<br></span></td>
</tr>
<tr>
<td>Maximum temperature</td>
<td><span class="azul-negrita">205 ºC</span><span class="azul-negrita"><br></span></td>
</tr>
<tr>
<td>Voltage</td>
<td><span class="azul-negrita">220 V </span>/<span class="azul-negrita"> 50 Hz<br></span></td>
</tr>
<tr>
<td>Power</td>
<td><span class="azul-negrita">450 W<br></span></td>
</tr>
</tbody>
</table>
<p> </p>
<p class="enlace"><a id="know-more6"></a> </p>
<p><strong>IRON DIMENSIONS</strong></p>
<table>
<tbody>
<tr>
<td>Iron (cm)</td>
<td><span class="azul-negrita">8.5 x 9.5 x 5</span></td>
</tr>
<tr>
<td>Non-slip base (cm)</td>
<td><span class="azul-negrita">7.5 x 11 x 3.3</span></td>
</tr>
<tr>
<td>Cable length (cm)</td>
<td><span class="azul-negrita">200</span></td>
</tr>
<tr>
<td>Iron weight (g)</td>
<td><span class="azul-negrita">475</span></td>
</tr>
</tbody>
</table>
<p> </p>
<p class="enlace"><a id="know-more8"></a> </p>
<p><strong>CASE DIMENSIONS</strong></p>
<table>
<tbody>
<tr>
<td>Exterior (cm)</td>
<td><span class="azul-negrita">17 x 12.5 x 8</span></td>
</tr>
<tr>
<td>Interior (cm)</td>
<td><span class="azul-negrita">16 x 11 x 6</span></td>
</tr>
<tr>
<td>Weight (g)</td>
<td><span class="azul-negrita">121</span></td>
</tr>
</tbody>
</table>
<p> </p>
<p class="enlace"><a id="know-more10"></a> </p>
<p><strong>WARRANTY</strong></p>
<ul>
<li>As stipulated by law in: <a href="https://www.brildor.com/en/general-terms-and-conditions-for-the-sale#warranty" target="_blank" rel="noopener">General Terms and Conditions for the Sale of Goods</a></li>
</ul>
https://www.brildor.com/media/catalog/product/p/l/plancha-cricut-easypress-3-mini_1.jpg
57.84
instock
0
57.84
0
0
0
https://www.brildor.com/media/catalog/product/p/l/plancha-cricut-easypress-3-mini_1.jpg
48373
50140
53061
54399
/Heat Presses
/Heat Presses/Heat Presses & Ovens/Special Heat Presses
/Heat Presses/Heat Presses & Ovens
2025-06-02T10:48:47+0000
