Basic Laser Screen Printing Kit xTool
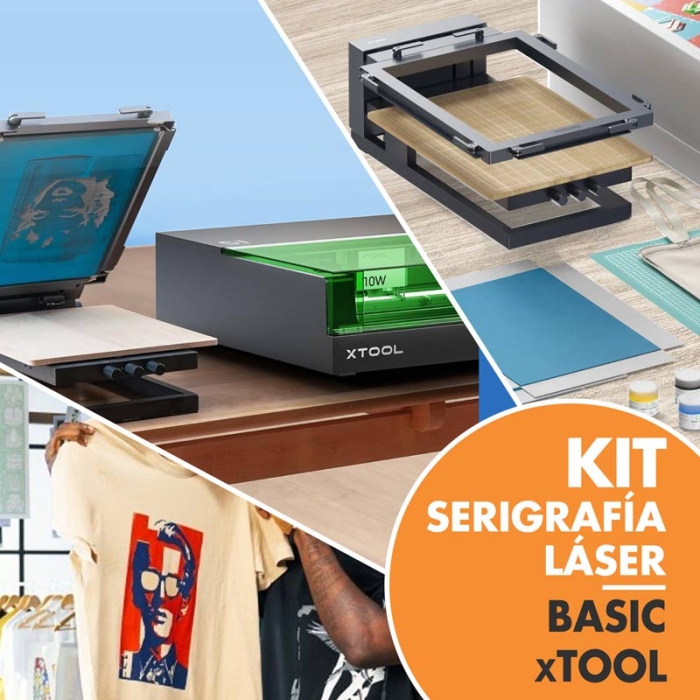
Basic Laser Screen Printing Kit xTool
Unique in combining laser engraving and screen printing techniques.
Engrave the screen with your laser and print the design using the screen printing machine included in the kit.
- Printing area: 22.8 x 30.4 cm and 29.2 x 40.6 cm (only for P/F/S/D series)
- Micro-registration on 3 axes: precision for colour printing
- Accessories, consumables, and tools to get started
- Additional frames and meshes available separately

Related Products
More information about the Basic Laser Screen Printing Kit xTool
INDEX
> Screen printing machine features
> Frame and mesh features for laser engraving
> Included consumables and accessories
> Additional frames and meshes for the screen printing machine
> xTool machines compatible with the kits
SCREEN PRINTING MACHINE FEATURES
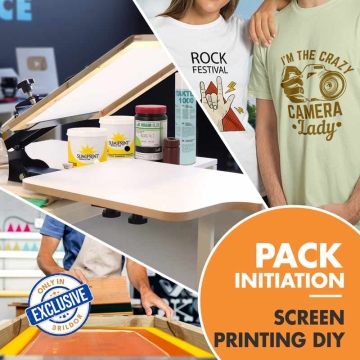
- 1 workstation: pre-assembled and ready to use, no additional tools required
- Height lock: allows you to adjust and secure the frame height, making it possible to print objects up to 60 mm thick
- Multi-colour printing: 3 adjustment knobs move the base laterally and vertically, providing millimetre precision for multicolour prints
- Wooden base 35 x 45 cm: magnetised, it attaches securely to the machine and prevents movement during printing. Features a printed grid for greater accuracy
- Designer packaging: the machine and all kit components come in an elegant presentation box. For protection, it is shipped in a cardboard box
FRAME AND MESH FEATURES FOR LASER ENGRAVING
Each box includes a frame and 1 polyester 100 mesh, depending on the kit:
- 22.8 x 30.4 cm all series (Ref. 056977)
- 29.2 x 40.6 cm for Series F/S/D (Ref. 054914)
FRAMES
- Aluminium construction: frame with slots on each side where the mesh is fixed before engraving. Includes 4 tabs that open or close the slots to secure it
- Plastic tensioning pins: used to tension the mesh effortlessly. Inserted into each slot of the frame, over the mesh. Once the pins are in place, the screen is ready for engraving
POLYESTER 100 MESH
- Ready to assemble and engrave: coated with dark polyester, suitable for engraving with diode or fibre lasers. No pre-treatment required (emulsion, developing, etc.)
- Durable: with a longer lifespan than traditional meshes
- Near-photographic resolution: the laser-engraved screen faithfully reproduces fine details of the designs to be printed
INCLUDED CONSUMABLES AND ACCESSORIES
- Mat: adhesive on both sides to secure the item to be printed on the base. Features a pre-printed grid with numerical scales in centimetres and inches for easy positioning
- Squeegee: with wooden handle and straight profile, suitable for applying ink using steel meshes. Includes a magnet for attachment to the machine
- Water-based screen printing ink: black
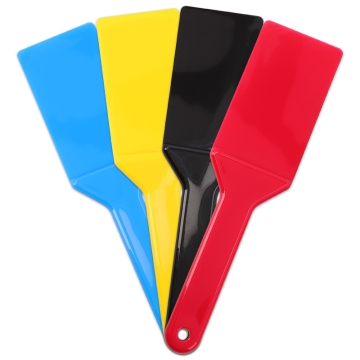
- Spatula: for spreading and collecting excess ink
- Positioning stickers: useful for series printing. Place stickers on the magnetic base to mark where to position the material
- Test material: includes an oil painting canvas and a small mesh to test engraving parameters on your laser machine
THINGS TO KEEP IN MIND
- Polyester meshes are not suitable for xTool machines with CO2 lasers
- To engrave frames on xTool Series P and M machines, it is necessary to use the lifting base
- Infrared lasers are not recommended for engraving stainless steel meshes, as they do not achieve the required detail and precision
- Purchase the positioning device to keep the screen fixed and immobilised during engraving on your xTool S1 machine (Ref. 057464)
- To wash and reuse the screens, it is advisable not to use abrasive products, as they may remove the polymer layer from the mesh
WHAT DO THE KITS INCLUDE?
| 1 | Screen printing machine |
| 1 | Wooden base 35 x 45 cm |
| 1 | Polyester 100 mesh |
| 1 | Frame |
| 2 | Long tensioning pins 40 x 1.3 x 3 cm |
| 2 |
Short tensioning pins 28.6 x 1.3 x 3 cm |
| 1 | Adhesive mat 35 x 45 cm |
| 1 | Straight profile rubber squeegee 12.7 x 22.9 cm |
| 1 | Ink spatula 2 x 20 cm |
| 1 | Water-based ink 100 ml |
| 1 | Oil painting canvas 20 x 25.2 x 1.5 cm |
| 1 | Test mesh 10 x 10 cm |
| 1 | Sheet of positioning stickers |
| 1 | User manual |
| 1 | Frequently asked questions |
| 1 |
Storage box |
ADDITIONAL FRAMES AND MESHES FOR THE SCREEN PRINTING MACHINE
FRAMES
- Sturdy aluminium structure
- Attach by hooking the machine arm tabs onto the frame
- 4 tabs that open or close to secure the mesh when inserted into the slots
- 4 tensioning pins to stretch the mesh. Inserted into each slot of the frame, over the mesh
- Different sizes compatible with xTool machines:
- All series: 22.8 x 30.4 cm (Ref. 056976)
- Series P/F/S/D: 29.2 x 40.6 cm (Ref. 055479)
PRE-TREATED MESHES FOR LASER ENGRAVING
- Suitable for machines with diode or CO2 laser: Series M/F/P/S/D
- Pre-treated. Coated with dark-coloured polymer. Ready to mount on the frame and engrave with laser
- Made of stainless steel. More durable than traditional meshes
- Easy to assemble: the ends of the mesh are inserted into the frame slots and secured with the pins
- Different sizes compatible with screen printing frames for xTool machines:
- All series: 22.8 x 30.4 cm (Ref. 055480)
- Series P/F/S/D: 29.2 x 40.6 cm (Ref. 055481)
- Pair of gloves included
POLYESTER MESHES FOR LASER ENGRAVING
- Suitable for machines with diode or fibre laser: Series M/F/S/D
- Coated with dark polyester. Ready to mount on the frame and engrave with laser
- Easy to assemble: the ends of the mesh are inserted into the frame slots and secured with the pins
- Available with different thread counts:
- 100 mesh: wider thread spacing, ideal for simple designs and more open areas
- 200 mesh: higher thread count, with smaller spacing, designed for more detailed work
- Different sizes compatible with screen printing frames for xTool machines:
- All series: 22.8 x 30.4 cm (Ref. 056975)
- Series F/S/D: 29.2 x 40.6 cm (Ref. 056974)
- Pair of gloves included
XTOOL MACHINES COMPATIBLE WITH THE KITS
| Ref. | 056977 | 054914 |
| Frame (cm) | 22.8 x 30.4 | 29.2 x 40.6 |
| Series F | ✔ | ✔ |
| Series P | ✔ | ✔ |
| Series S* | ✔ | ✔ |
| Series M | ✔ | ✗ |
| Series D | ✔ | ✔ |
* Purchase the positioning device to keep the screen fixed and immobilised during engraving on your xTool S1 machine (Ref. 057464).
INSTRUCTIONS FOR USE
PREPARE THE SCREEN
- Insert the mesh into the frame slots following the markings
- Insert the pins and ensure it is well tensioned before closing the tabs
- Engrave the design onto the screen with your diode or fibre laser machine
PREPARE THE SCREEN PRINTING MACHINE
- Insert the frame into the top of the screen printing machine and close the top tabs to secure it
- Place the wooden base on the magnets and adjust its position with the 3 knobs
- Place the mat on the base to prevent the item to be printed from moving
- Lower the frame to the desired height and lock it in place with the locking wheel
CUSTOMISE
- Pour the ink onto the screen with the spatula and spread it firmly with the squeegee over the design
- Unlock the frame with the wheel and carefully remove the printed product
- Wait approximately 10 minutes for the ink to dry properly
SCREEN PRINTING MACHINE AND KIT DIMENSIONS
| Machine closed (cm) | 35 x 21 x 63 |
| Max. opening angle (º) | 60 |
| Kit box (cm) |
44.8 x 28 x 69 |
| Packing box (cm) | 45.7 x 30.5 x 71.5 |
| Machine weight (kg) |
9.35 |
| Kit weight (kg) |
16.40 |
| Ref. | 952380 |
|---|
Reviews
Share your opinion
It will only take a minute, and your opinion can help other customers.
Sign in to submit your review
Write a review
Rating
Add photos of your product (optional)
Sending review...
Error
Review sent Thank you for your interest!
Questions
No questions found for this product.
Be the first to ask a question!
Ask a question
Please complete the CAPTCHA
Submitting your question...
Error
Question Submitted Thank you for your interest!

