More information about the We R Memory Keepers Mold Press and supplies
Ideal for making unique shapes moulds for candles, soaps, magnets, jewellery, biscuits, ceramics, cases and shaker cards.
Includes a universal adapter to connect the hoover to the Mold Press.
We R Memory Keepers food-safe plastic sheets used for turning objects into 3D shapes. These have 1 protective film on each side, which must be removed before use.
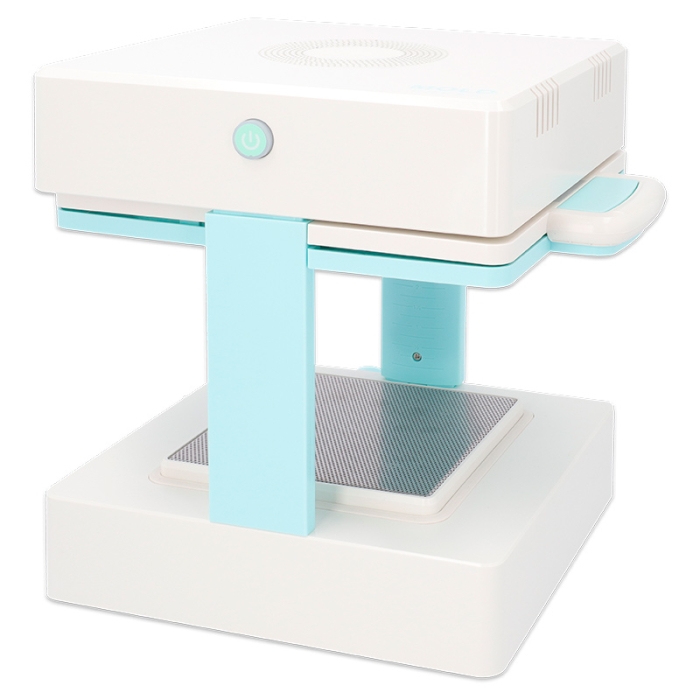
Magnetic frames designed to move the hot plastic sheet from the top tray to the bottom tray. This movement creates the mould.
Top tray: heats the plastic where the mould will be made.
Bottom tray: makes the vacuum once it comes into contact with the hot plastic.
Columns with measurements in inches which serve as a reference to measure both the drop of the hot plastic and the height of the object to be moulded.
Power button. Once switched on, the top screen will start to heat up.
US plug with European adaptor included.
User manual.
MOLD PRESS CONSUMABLES
The following consumables are required to use the Mold Press machine:
Powder mould release: great way to ensure easy removal of your materials from moulds thanks to its antistatic power.
Liquid mould release: helps to smooth out wrinkles or any other detail caused by the moulding process.
Replacement plastic sheets to create the moulds.
TIPS & TRICKS
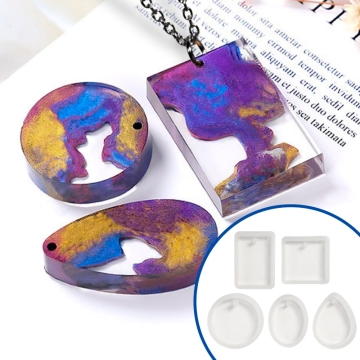
Create moulds of different shapes and fill them with resin to make rings, earrings and pendants.
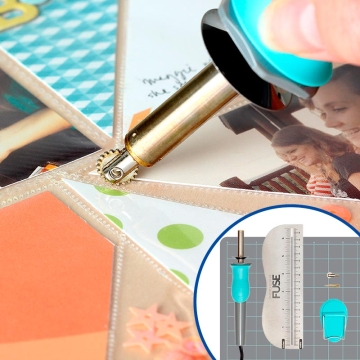
Make blister packs for your products in the shape of the product you want to wrap. Use the Fuse Tool (Ref. 927698) to seal and cut the corners of the blister, including a hole to hang it in displays. Insert a piece of cardboard with your brand name inside the blister for unique and original packaging.
If you want to make several moulds at the same time, place the objects well separated to get a clean mould.
If the plastic sticks to the object, use the powder to remove it easily.
Apply the liquid mould release to touch up the corners and remove any wrinkles. The machine needs to be on and the plastic hot to do so.
To improve the result of your mould, keep pressure on the frames while it is being created.
Wearing gloves is highly advisable when using the machine.
WHAT DOES THE MOLD PRESS INCLUDE?
1
Mold Press machine
2
Magnetic frames
1
Vacuum hose adapter
1
Universal plug adapter
4
PETG plastic sheets
DIMENSIONS (APPROX.)
Mold Press machine
31.6 x 27.1 x 21.7 cm
Vacuum screen
14 x 14 cm
Heating screen
14 x 14 cm
Plastic sheets
17 x 17 cm
Max. mould size
14 x 7.62 x 14 cm
Suction power
5-10 A
Voltage
120 V
Packaging
33.2 x 25.3 x 14.8 cm
Gross weight
2.63 kg
MOLD PRESS CONSUMABLES
Reference no.
Item
Dimensions
Packaging
Weight
040544
Liquid mould release
4 oz / 118 ml
7 x 20 x 5.5 cm
124 g
040545
Plastic sheets - Pack of 6 units
17 x 17 cm
18.5 x 21 x 0.5 cm
146 g
040546
Plastic sheets - Pack of 40 units
17 x 17 cm
18.2 x 18 x 3.1 cm
884 g
040547
Powder mould release
0.6 oz / 18 g
8.3 x 17.8 x 4.5 cm
49 g
INSTRUCTIONS FOR USE
Connect the adapter to the vacuum port of the Mold Press machine.
Attach the vacuum hose to the adapter.
Plug in the Mold Press and press the power button. The blue light indicates that the machine is on.
Wait 10 minutes for the machine to warm up before use.
Peel off both sides of the protective plastic film from the plastic sheets.
Separate the magnetic frames and place the plastic sheet between the two trays. Press them together.
Slide the magnetic trays into the machine and attach them to the heater located on the top.
You will know it is ready when the plastic has softened and is drooping down 2.5 cm. To measure the melted plastic, use the measurements located in the columns of the Mold Press.
Place the object on the bottom.
Turn on the hoover and slide the magnetic frames down over the object.
Turn off the hoover when you have achieved the desired shape, and the plastic has cooled slightly.
Once cool, pop the object out.
THINGS TO KEEP IN MIND
Every plastic sheet has 1 protective film on each side you must remove before use.
Do not leave the object inside the hot plastic for more than 5 minutes
The Mold Press is recommended for use in open spaces, as the plastic sheets may release smoke after heating.
https://www.brildor.com/en/we-r-memory-keepers-mold-press-supplies27808We R Memory Keepers - Mold Press & Supplies<p><a name="know-more"></a></p>
<h2>More information about the We R Memory Keepers Mold Press and supplies</h2>
<ul>
<li>Ideal for making unique shapes moulds for candles, soaps, magnets, jewellery, biscuits, ceramics, cases and shaker cards.</li>
<li>Includes a universal adapter to connect the hoover to the Mold Press.</li>
<li>We R Memory Keepers food-safe plastic sheets used for turning objects into 3D shapes. These have 1 protective film on each side, which must be removed before use.</li>
<li>Magnetic frames designed to move the hot plastic sheet from the top tray to the bottom tray. This movement creates the mould.</li>
<li>Top tray: heats the plastic where the mould will be made.</li>
<li>Bottom tray: makes the vacuum once it comes into contact with the hot plastic.</li>
<li>Columns with measurements in inches which serve as a reference to measure both the drop of the hot plastic and the height of the object to be moulded.</li>
<li>Power button. Once switched on, the top screen will start to heat up.</li>
<li>US plug with European adaptor included.</li>
<li>User manual.</li>
</ul>
<p><strong>MOLD PRESS CONSUMABLES</strong></p>
<p>The following consumables are required to use the Mold Press machine:</p>
<ul>
<li>Powder mould release: great way to ensure easy removal of your materials from moulds thanks to its antistatic power.</li>
<li>Liquid mould release: helps to smooth out wrinkles or any other detail caused by the moulding process.</li>
<li>Replacement plastic sheets to create the moulds.</li>
</ul>
<p><strong>TIPS & TRICKS</strong></p>
<ul>
<li>Create moulds of different shapes and fill them with resin to make rings, earrings and pendants.</li>
<li>Make blister packs for your products in the shape of the product you want to wrap. Use the Fuse Tool (Ref. 927698) to seal and cut the corners of the blister, including a hole to hang it in displays. Insert a piece of cardboard with your brand name inside the blister for unique and original packaging.</li>
<li>If you want to make several moulds at the same time, place the objects well separated to get a clean mould.</li>
<li>If the plastic sticks to the object, use the powder to remove it easily.</li>
<li>Apply the liquid mould release to touch up the corners and remove any wrinkles. The machine needs to be on and the plastic hot to do so.</li>
<li>To improve the result of your mould, keep pressure on the frames while it is being created.</li>
<li>Wearing gloves is highly advisable when using the machine.</li>
</ul>
<p><strong>WHAT DOES THE MOLD PRESS INCLUDE?</strong></p>
<table>
<tbody>
<tr>
<td>1</td>
<td>Mold Press machine</td>
</tr>
<tr>
<td>2</td>
<td>Magnetic frames</td>
</tr>
<tr>
<td>1</td>
<td>Vacuum hose adapter</td>
</tr>
<tr>
<td>1</td>
<td>Universal plug adapter</td>
</tr>
<tr>
<td>4</td>
<td>PETG plastic sheets</td>
</tr>
</tbody>
</table>
<p><span style="font-size: small;"> </span><strong>DIMENSIONS (APPROX.) <br></strong></p>
<table>
<tbody>
<tr>
<td>Mold Press machine</td>
<td class="azul-negrita">31.6 x 27.1 x 21.7 cm</td>
</tr>
<tr>
<td>Vacuum screen</td>
<td class="azul-negrita">14 x 14 cm</td>
</tr>
<tr>
<td>Heating screen</td>
<td class="azul-negrita">14 x 14 cm</td>
</tr>
<tr>
<td>Plastic sheets</td>
<td class="azul-negrita">17 x 17 cm</td>
</tr>
<tr>
<td>Max. mould size</td>
<td class="azul-negrita">14 x 7.62 x 14 cm</td>
</tr>
<tr>
<td>Suction power</td>
<td class="azul-negrita">5-10 A</td>
</tr>
<tr>
<td>Voltage</td>
<td class="azul-negrita">120 V</td>
</tr>
<tr>
<td>Packaging</td>
<td class="azul-negrita">33.2 x 25.3 x 14.8 cm</td>
</tr>
<tr>
<td>Gross weight</td>
<td class="azul-negrita">2.63 kg</td>
</tr>
</tbody>
</table>
<p><strong>MOLD PRESS CONSUMABLES</strong> </p>
<table>
<tbody>
<tr>
<td><strong>Reference no.</strong></td>
<td><strong>Item</strong></td>
<td><strong>Dimensions</strong></td>
<td><strong>Packaging</strong></td>
<td><strong>Weight</strong></td>
</tr>
<tr>
<td>040544</td>
<td>Liquid mould release</td>
<td class="azul-negrita">4 oz / 118 ml</td>
<td class="azul-negrita">7 x 20 x 5.5 cm</td>
<td class="azul-negrita">124 g</td>
</tr>
<tr>
<td>040545</td>
<td>Plastic sheets - Pack of 6 units</td>
<td class="azul-negrita">17 x 17 cm</td>
<td class="azul-negrita">18.5 x 21 x 0.5 cm</td>
<td class="azul-negrita">146 g</td>
</tr>
<tr>
<td>040546</td>
<td>Plastic sheets - Pack of 40 units</td>
<td class="azul-negrita">17 x 17 cm</td>
<td class="azul-negrita">18.2 x 18 x 3.1 cm</td>
<td class="azul-negrita">884 g</td>
</tr>
<tr>
<td>040547</td>
<td>Powder mould release</td>
<td class="azul-negrita">0.6 oz / 18 g</td>
<td class="azul-negrita">8.3 x 17.8 x 4.5 cm</td>
<td class="azul-negrita">49 g</td>
</tr>
</tbody>
</table>
<p><strong>INSTRUCTIONS FOR USE</strong></p>
<ul>
<li>Connect the adapter to the vacuum port of the Mold Press machine.</li>
<li>Attach the vacuum hose to the adapter.</li>
<li>Plug in the Mold Press and press the power button. The blue light indicates that the machine is on.</li>
<li>Wait <span class="azul-negrita">10 minutes</span> for the machine to warm up before use.</li>
<li>Peel off both sides of the protective plastic film from the plastic sheets.</li>
<li>Separate the magnetic frames and place the plastic sheet between the two trays. Press them together.</li>
<li>Slide the magnetic trays into the machine and attach them to the heater located on the top.</li>
<li>You will know it is ready when the plastic has softened and is drooping down <span class="azul-negrita">2.5 cm</span>. To measure the melted plastic, use the measurements located in the columns of the Mold Press.</li>
<li>Place the object on the bottom.</li>
<li>Turn on the hoover and slide the magnetic frames down over the object.</li>
<li>Turn off the hoover when you have achieved the desired shape, and the plastic has cooled slightly.</li>
<li>Once cool, pop the object out.</li>
</ul>
<p><strong>THINGS TO KEEP IN MIND</strong></p>
<ul>
<li>Every plastic sheet has 1 protective film on each side you must remove before use.</li>
<li>Do not leave the object inside the hot plastic for more than <span class="azul-negrita">5 minutes</span></li>
<li>The Mold Press is recommended for use in open spaces, as the plastic sheets may release smoke after heating.</li>
</ul>
<p> </p>https://www.brildor.com/media/catalog/product/m/o/moldpress-we-r-prensa-para-hacer-moldes-y-sus-consumibles-d15.jpg7.6instock07.6000https://www.brildor.com/media/catalog/product/m/o/moldpress-we-r-prensa-para-hacer-moldes-y-sus-consumibles-d15.jpg842827431274612747027471276984339651866/Arts & Crafts/Arts & Crafts/We R Memory Keepers/Arts & Crafts/Machines2021-07-24T06:00:09+0000