Sublimable Canvas Pictures - Dekorarte
Sublimable Canvas Pictures - Dekorarte
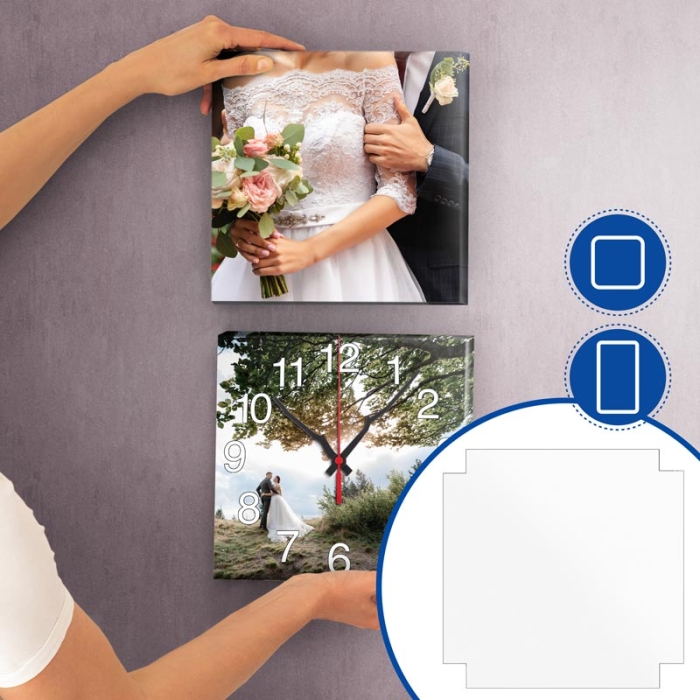
Wood lined with canvas ready for sublimation with press from flat platen.
Sides with function from frame which are folded after the dye sublimation printing to create the frame.
- Polyester satin fabric for high quality photographic prints
- Board MDF 8 mm thick
- Pre-cut hole in the wood to convert the frame into a clock (only Ref. 000500 and 000218)
More information
More information about Sublimable Canvas Pictures - Dekorarte
INDEX
> Description
> Things to keep in mind
> Customizable template
> Dimensions
> Recommended instructions and parameters for sublimation printing
DESCRIPTION
- High density chipboard squares
- Wide edges: between 2,5 and 4 cm depending on the model. The printed design is visible because the frame is sublimated flat, including the side panels, which are also covered with fabric
- Satin canvas with high print quality. Bright and vivid colours
- The square frames have a hole in the wood for clock mechanisms. All you need to do is punch a hole in the canvas. In the case of rectangular frames, a hole can be drilled through the wood
- Once sublimated, fold the sides and fix the corners with staples and/or glue
THINGS TO KEEP IN MIND
- Choose the Related Products the appropriate machinery for panels with a thickness of 8 mm
- Rectangular squares can also be turned into clocks; you only need to open a hole on the fabric and the wood
CUSTOMIZABLE TEMPLATE
Open the PDF file using Photoshop. Remember to turn on layers:
Dekorarte Canvas Template (.pdf - 7.2 MB)
DIMENSIONS
| Reference |
000500 |
000218 |
000501 |
| Shape |
Square |
Square |
Rectangular |
| Minimum print format |
A3 |
A2 |
A2 |
| Option clock |
Yes |
Yes |
No |
| Canvas (cm) |
20 x 20 |
27 x 27 |
31 x 41 |
| Border (cm) |
2,5 |
4 |
4 |
| Print area (cm) |
25 x 25 |
35 x 35 |
39 x 49 |
RECOMMENDED INSTRUCTIONS AND PARAMETERS FOR SUBLIMATION PRINTING
Parameters are given as a guide only. It is recommended to carry out preliminary tests in order to make the necessary adjustments before starting production.
- Print the design in mode mirror
- Preheat the press to 200 ºC
- Place the board on the base of the plate and the printed part of the paper on the board. Fix with heat tape
- Close the press at medium pressure for 70 seconds
- With the help of a protective glove remove the freshly printed board
- Carefully remove the paper
- Fold and join the edges with a stapler. Insert one or two staples
Questions
No questions found for this product.
Be the first to ask a question!
https://www.brildor.com/en/sublimable-canvas-pictures-dekorarte
15419
Sublimable Canvas Pictures - Dekorarte
<p><a name="saber-mas"></a></p>
<h2>More information about Sublimable Canvas Pictures - Dekorarte</h2>
<p> </p>
<p><strong>INDEX</strong></p>
<p>> <a href="#saber-mas1">Description</a></p>
<p>> <a href="#saber-mas5">Things to keep in mind</a></p>
<p>> <a href="#saber-mas3">Customizable template</a></p>
<p>> <a href="#saber-mas2">Dimensions</a></p>
<p>> <a href="#saber-mas4">Recommended instructions and parameters for sublimation printing</a></p>
<p> </p>
<p><a name="saber-mas1"></a></p>
<p><strong>DESCRIPTION</strong></p>
<ul>
<li>High density chipboard squares</li>
<li>Wide edges: between <span class="azul-negrita">2,5</span> and <span class="azul-negrita">4 cm</span> depending on the model. The printed design is visible because the frame is sublimated flat, including the side panels, which are also covered with fabric</li>
<li>Satin canvas with high print quality. Bright and vivid colours</li>
<li>The square frames have a hole in the wood for clock mechanisms. All you need to do is punch a hole in the canvas. In the case of rectangular frames, a hole can be drilled through the wood</li>
<li>Once sublimated, fold the sides and fix the corners with staples and/or glue</li>
</ul>
<p> </p>
<p><a name="saber-mas5"></a></p>
<p><strong>THINGS TO KEEP IN MIND</strong></p>
<ul>
<li>Choose the <strong>Related Products</strong> the appropriate machinery for panels with a thickness of <span class="azul-negrita">8 mm</span></li>
<li>Rectangular squares can also be turned into clocks; you only need to open a hole on the fabric and the wood</li>
</ul>
<p> </p>
<p><a name="saber-mas3"></a></p>
<p><strong>CUSTOMIZABLE TEMPLATE</strong></p>
<p>Open the PDF file using Photoshop. Remember to turn on layers:</p>
<p><a href="https://hidrive.ionos.com/lnk/GRGga3IsC" target="_blank" rel="noopener">Dekorarte Canvas Template (.pdf - 7.2 MB)</a></p>
<p> </p>
<p><a name="saber-mas2"></a></p>
<p><strong>DIMENSIONS<br /></strong></p>
<table>
<tbody>
<tr>
<td><strong>Reference</strong></td>
<td style="text-align: center;"><strong>000500</strong></td>
<td style="text-align: center;"><strong>000218</strong></td>
<td style="text-align: center;"><strong>000501</strong></td>
</tr>
<tr>
<td><strong>Shape </strong></td>
<td style="text-align: center;">Square</td>
<td style="text-align: center;">Square</td>
<td style="text-align: center;">Rectangular</td>
</tr>
<tr>
<td><strong>Minimum print format</strong></td>
<td style="text-align: center;">A3</td>
<td style="text-align: center;">A2</td>
<td style="text-align: center;">A2</td>
</tr>
<tr>
<td><strong>Option clock</strong></td>
<td style="text-align: center;">Yes</td>
<td style="text-align: center;">Yes</td>
<td style="text-align: center;">No</td>
</tr>
<tr>
<td><strong>Canvas (cm)</strong></td>
<td style="text-align: center;"><span class="azul-negrita">20 x 20</span></td>
<td style="text-align: center;"><span class="azul-negrita">27 x 27</span></td>
<td style="text-align: center;"><span class="azul-negrita">31 x 41</span></td>
</tr>
<tr>
<td><strong>Border (cm)</strong></td>
<td style="text-align: center;"><span class="azul-negrita">2,5</span></td>
<td style="text-align: center;"><span class="azul-negrita">4</span></td>
<td style="text-align: center;"><span class="azul-negrita">4</span></td>
</tr>
<tr>
<td><strong>Print area (cm)</strong></td>
<td style="text-align: center;"><span class="azul-negrita">25 x 25</span></td>
<td style="text-align: center;"><span class="azul-negrita">35 x 35</span></td>
<td style="text-align: center;"><span class="azul-negrita">39 x 49</span></td>
</tr>
</tbody>
</table>
<p><a name="saber-mas4"></a></p>
<p> </p>
<p><strong>RECOMMENDED INSTRUCTIONS AND PARAMETERS FOR SUBLIMATION PRINTING</strong></p>
<p>Parameters are given as a <strong>guide</strong> only. It is recommended to carry out preliminary tests in order to make the necessary adjustments before starting production.</p>
<ul>
<ul>
<li>Print the design in <strong>mode</strong> <strong> mirror</strong></li>
<li>Preheat the press to <span class="azul-negrita">200 ºC</span></li>
<li>Place the board on the base of the plate and the printed part of the paper on the board. Fix with heat tape</li>
<li>Close the press at <strong>medium pressure</strong> for <span class="azul-negrita">70 seconds</span></li>
<li>With the help of a protective glove remove the freshly printed board</li>
<li>Carefully remove the paper</li>
<li>Fold and join the edges with a stapler. Insert one or two staples</li>
</ul>
</ul>
https://www.brildor.com/media/catalog/product/c/u/cuadros-dekorarte-pack-2ud-d14.jpg
10.95
instock
0
10.95
0
0
0
https://www.brildor.com/media/catalog/product/c/u/cuadros-dekorarte-pack-2ud-d14.jpg
20249
24416
27464
27720
48499
51942
51996
53312
/BLANKS
/BLANKS/Canvas
/BLANKS/Clocks
/BLANKS/Canvases
2021-07-24T06:12:48+0000


