Self Adhesive Removable Vinyl for sublimation and laser printing - Washaffix
Share
Self Adhesive Removable Vinyl for sublimation and laser printing - Washaffix
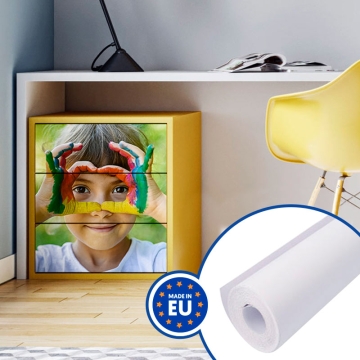
Washaffix removable vinyl you can personalise using dye sublimation and laser printing. Great for making both small and large stickers for sign making, lettering, and shop window decoration.
High transparency with gloss finish and a thickness of 60 µ
Suitable for all kinds of smooth, non-porous surfaces.
Sale units: 1 m, 5 m or 30 m rolls with a width of 50 cm, and 3 m or 30 m rolls with a width of 100 cm
More information about Washaffix self-adhesive printable vinyl for sublimation and laser printing
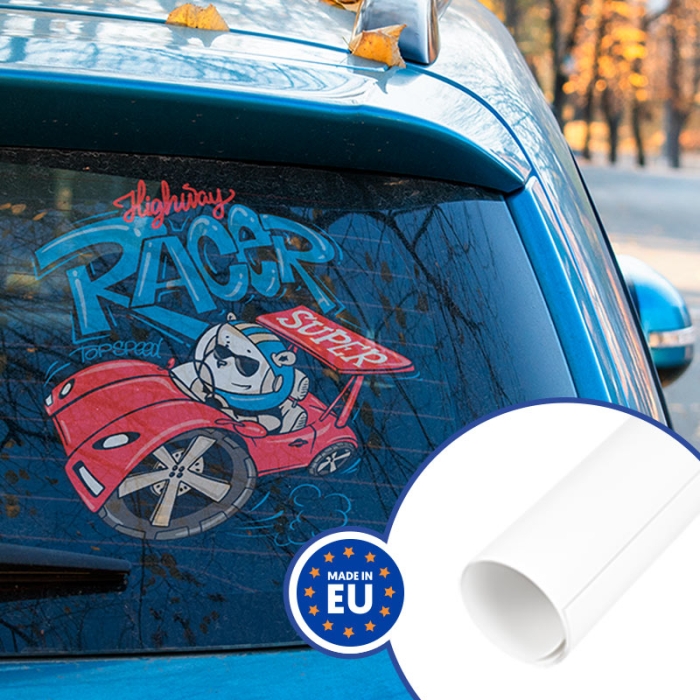
Perfect for temporary stickers to stick on vehicles or promotional material for small shops.
Clear and waterproof. No additional lamination is required.
This vinyl can be printed using 2 different methods: directly with a laser printer or using dye sublimation printing. Also, you can sublimate it either before or after sticking it to the surface of the object.
High tear resistance. Its composition prevents the appearance of streaks during handling.
Excellent transparency without graining or yellowing, perfect to achieve interesting optical effects.
Pressure-sensitive adhesive (PSA). You must apply pressure to the vinyl for it to stick.
Low tack for easy removal, without leaving any residue on the applied area.
The liner is water-resistant and highly stabilised. It is ideal for personalising the vinyl using direct printing.
Compatible with dry toner, LED, or flash fusing laser printers.
Can be cut with any vinyl cutter.
18 months shelf life upon delivery, provided storage, use and printing environmental conditions are met.
THINGS TO KEEP IN MIND
Use a squeegee to apply the adhesive to the surface you are personalising and avoid the formation of air bubbles. You will find it in Related Products.
If you want to get higher opacity, we recommend using matte white Washaffix vinyl. You will find it in Related Products (Ref. 925976 and Ref. 925983).
Avoid using microwaves on glasses, mugs, or plates personalised with Washaffix.
If you’re using a Silhouette Cameo vinyl cutter, the recommended cutting parameters for this vinyl are the following: blade setting (2), speed (2), force (20) and number of passes (1).
TECHNICAL DETAILS
Reference nº
038658
038659
038660
038661
038662
Type
Clear
Clear
Clear
Clear
Clear
Format
Roll (with core)
Roll (without core)
Roll (with core)
Roll (without core)
Roll (without core)
Dimensions
100 cm x 30 m
100 cm x 3 m
50 cm x 30 m
50 cm x 5 m
50 cm x 1 m
Vinyl thickness
60 μ
60 μ
60 μ
60 μ
60 μ
Liner thickness
140 μ
140 μ
140 μ
140 μ
140 μ
Grammage
235 gsm
235 gsm
235 gsm
235 gsm
235 gsm
STORAGE CONDITIONS, PRINTING LOCATION AND USE
For
Temperature
Relative humidity
Print room
10°C - 30°C
40% - 55%
Use
-40°C - 158°C
10% - 100%
Storage
10°C - 20°C
20% - 55%
How to personalise and apply Washaffix vinyl?
SUBLIMATION BEFORE APPLICATION: RECOMMENDED INSTRUCTIONS AND PARAMETERS
Print the design in mirror image, using sublimation paper.
Remove the liner from the Washaffix and stick it to protective paper or any other silicone paper. Use a squeegee to avoid air bubbles or wrinkles. Keep the liner for later.
Preheat the press to 190ºC.
Place the Washaffix vinyl on the press’ lower platen and the printed design on top of it(*). Cover them with another layer of protective paper.
Press for 35 seconds, low pressure.
Remove the layer of protective paper from the sublimated Washaffix vinyl and reattach it to its liner.
With a dry cloth, clean any ink residue that might remain on the vinyl after pressing.
Cut the design with a vinyl cutter if possible.
When applying the design, simply remove the liner and stick it to the surface you are personalising.
(*) To guarantee a more uniform pressure, you may place a thin board, or something similar, on the press’ lower platen before placing the vinyl.
SUBLIMATION AFTER APPLICATION: RECOMMENDED INSTRUCTIONS AND PARAMETERS
Cut and stick the Washaffix vinyl to the object you want to personalise.
If necessary, use heat-resistant tape to protect the parts of the item that may get damaged by heat.
Print the design in mirror image, using sublimation paper.
Preheat the press to 190ºC.
Place the item on the press’ lower platen, with the vinyl to be printed facing up.
Place the previously printed design on the vinyl.
Press for 35 seconds, heavy pressure.
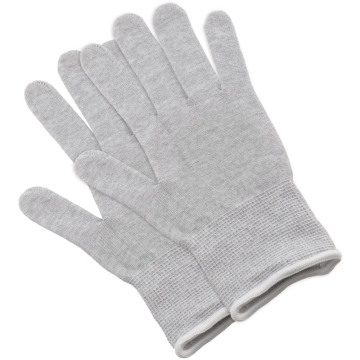
Using a protective glove, remove the item with the newly printed vinyl.
Remove the paper carefully.
LASER PRINTING
You can use any laser printer: standard or white toner, with LED technology or flash fusing.
Select the paper type in your printer: “Transparency” or the most suitable option according to the thickness and grammage of this vinyl.
Place the vinyl in the printer tray.
Print the design on the vinyl.
Cut the outline of the design using scissors or a vinyl cutter.
Remove the excess media, leaving on the liner the design you want to stick to the item.
Slightly peel the design off its backing at one end, but enough so that it sticks to the vinyl to begin its application.
Gradually place the vinyl on the target surface. Use a squeegee to avoid the formation of air bubbles.
https://www.brildor.com/en/self-adhesive-removable-vinyl-for-sublimation-washaffix-printable-clear27198Self Adhesive Removable Vinyl for sublimation and laser printing - Washaffix<p><a name="know-more1"></a></p>
<h2>More information about Washaffix self-adhesive printable vinyl for sublimation and laser printing</h2>
<ul>
<li>Perfect for temporary stickers to stick on vehicles or promotional material for small shops.</li>
<li>Clear and waterproof. No additional lamination is required.</li>
<li>This vinyl can be printed using 2 different methods: directly with a laser printer or using dye sublimation printing. Also, you can sublimate it either before or after sticking it to the surface of the object.</li>
<li>High tear resistance. Its composition prevents the appearance of streaks during handling.</li>
<li>Excellent transparency without graining or yellowing, perfect to achieve interesting optical effects.</li>
<li>Pressure-sensitive adhesive (PSA). You must apply pressure to the vinyl for it to stick.</li>
<li>Low tack for easy removal, without leaving any residue on the applied area.</li>
<li>The liner is water-resistant and highly stabilised. It is ideal for personalising the vinyl using direct printing.</li>
<li>Compatible with dry toner, LED, or flash fusing laser printers.</li>
<li>Can be cut with any vinyl cutter.</li>
<li>18 months shelf life upon delivery, provided storage, use and printing environmental conditions are met.</li>
</ul>
<p> </p>
<p><strong>THINGS TO KEEP IN MIND<br></strong></p>
<ul>
<li>Use a squeegee to apply the adhesive to the surface you are personalising and avoid the formation of air bubbles. You will find it in <strong>Related Products</strong>.</li>
<li>If you want to get higher opacity, we recommend using matte white Washaffix vinyl. You will find it in <strong>Related Products</strong> (Ref. 925976 and Ref. 925983).</li>
<li>Avoid using microwaves on glasses, mugs, or plates personalised with Washaffix.</li>
<li>If you’re using a Silhouette Cameo vinyl cutter, the recommended cutting parameters for this vinyl are the following: blade setting (2), speed (2), force (20) and number of passes (1).</li>
</ul>
<p> </p>
<p><strong>TECHNICAL DETAILS</strong></p>
<table >
<tbody>
<tr>
<td><strong>Reference nº</strong></td>
<td style="text-align: center;"><strong>038658</strong></td>
<td style="text-align: center;"><strong>038659</strong></td>
<td style="text-align: center;"><strong>038660</strong></td>
<td style="text-align: center;"><strong>038661</strong></td>
<td style="text-align: center;"><strong>038662<br></strong></td>
</tr>
<tr>
<td><strong>Type</strong></td>
<td style="text-align: center;">Clear</td>
</tr>
<tr>
<td><strong>Format</strong></td>
<td style="text-align: center;">Roll (with core)</td>
<td style="text-align: center;">Roll (without core)</td>
<td style="text-align: center;">Roll (with core)</td>
<td style="text-align: center;">Roll (without core)</td>
</tr>
<tr>
<td><strong>Dimensions</strong></td>
<td class="azul-negrita" style="text-align: center;">100 cm x 30 m</td>
<td class="azul-negrita" style="text-align: center;">100 cm x 3 m</td>
<td class="azul-negrita" style="text-align: center;">50 cm x 30 m</td>
<td class="azul-negrita" style="text-align: center;">50 cm x 5 m</td>
<td class="azul-negrita" style="text-align: center;">50 cm x 1 m</td>
</tr>
<tr>
<td><strong>Vinyl thickness<br></strong></td>
<td class="azul-negrita" style="text-align: center;">60 μ</td>
</tr>
<tr>
<td><strong>Liner thickness</strong></td>
<td class="azul-negrita" style="text-align: center;">140 μ</td>
</tr>
<tr>
<td><strong>Grammage</strong></td>
<td class="azul-negrita" style="text-align: center;">235 gsm</td>
</tr>
</tbody>
</table>
<p> </p>
<p> </p>
<p><strong>STORAGE CONDITIONS, PRINTING LOCATION AND USE<br></strong></p>
<table >
<tbody>
<tr>
<td><strong>For</strong></td>
<td style="text-align: center;"><strong>Temperature</strong></td>
<td style="text-align: center;"><strong>Relative humidity</strong></td>
</tr>
<tr>
<td><strong>Print room</strong></td>
<td class="azul-negrita" style="text-align: center;"> 10°C - 30°C</td>
<td class="azul-negrita" style="text-align: center;">40% - 55%</td>
</tr>
<tr>
<td><strong>Use</strong></td>
<td class="azul-negrita" style="text-align: center;">-40°C - 158°C</td>
<td class="azul-negrita" style="text-align: center;">10% - 100%</td>
</tr>
<tr>
<td><strong>Storage</strong></td>
<td class="azul-negrita" style="text-align: center;"> 10°C - 20°C</td>
<td class="azul-negrita" style="text-align: center;">20% - 55%</td>
</tr>
</tbody>
</table>
<p> </p>
<p> </p>
<p><a name="know-more2"></a></p>
<h2>How to personalise and apply Washaffix vinyl?</h2>
<p><strong>SUBLIMATION BEFORE APPLICATION: RECOMMENDED INSTRUCTIONS AND PARAMETERS</strong></p>
<ul>
<li>Print the design in <strong>mirror image</strong>, using sublimation paper.</li>
<li>Remove the liner from the Washaffix and stick it to protective paper or any other silicone paper. Use a squeegee to avoid air bubbles or wrinkles. Keep the liner for later.</li>
<li>Preheat the press to <span class="azul-negrita">190ºC</span>.</li>
<li>Place the Washaffix vinyl on the press’ lower platen and the printed design on top of it<sup class="naranja-negrita">(*)</sup>. Cover them with another layer of protective paper.</li>
<li>Press for <span class="azul-negrita">35 seconds</span>, <strong>low</strong> pressure.</li>
<li>Remove the layer of protective paper from the sublimated Washaffix vinyl and reattach it to its liner.</li>
<li>With a dry cloth, clean any ink residue that might remain on the vinyl after pressing.</li>
<li>Cut the design with a vinyl cutter if possible.</li>
<li>When applying the design, simply remove the liner and stick it to the surface you are personalising.</li>
</ul>
<p><span style="font-size: small;"><sup class="naranja-negrita">(*)</sup> To guarantee a more uniform pressure, you may place <span style="font-size: small;">a thin board, or something similar,</span> on the press’ lower platen before placing the vinyl.</span></p>
<p> </p>
<p><strong>SUBLIMATION AFTER APPLICATION: RECOMMENDED INSTRUCTIONS AND PARAMETERS</strong></p>
<ul>
<li>Cut and stick the Washaffix vinyl to the object you want to personalise.</li>
<li>If necessary, use heat-resistant tape to protect the parts of the item that may get damaged by heat.</li>
<li>Print the design in <strong>mirror image</strong>, using sublimation paper.</li>
<li>Preheat the press to <span class="azul-negrita">190ºC</span>.</li>
<li>Place the item on the press’ lower platen, with the vinyl to be printed facing up.</li>
<li>Place the previously printed design on the vinyl.</li>
<li>Press for <span class="azul-negrita">35 seconds</span>, <strong>heavy pressure</strong>.</li>
<li>Using a protective glove, remove the item with the newly printed vinyl.</li>
<li>Remove the paper carefully.</li>
</ul>
<p> </p>
<p><strong>LASER PRINTING</strong></p>
<ul>
<li>You can use any laser printer: standard or white toner, with LED technology or flash fusing.</li>
<li>Select the paper type in your printer: “Transparency” or the most suitable option according to the thickness and grammage of this vinyl.</li>
<li>Place the vinyl in the printer tray.</li>
<li>Print the design on the vinyl.</li>
<li>Cut the outline of the design using scissors or a vinyl cutter.</li>
<li>Remove the excess media, leaving on the liner the design you want to stick to the item.</li>
<li>Slightly peel the design off its backing at one end, but enough so that it sticks to the vinyl to begin its application.</li>
<li>Gradually place the vinyl on the target surface. Use a squeegee to avoid the formation of air bubbles.</li>
</ul>
<p> </p>https://www.brildor.com/media/catalog/product/v/i/vinilo-adhesivo-imp-subli-washaffix-transp-repos-d15.jpg5.59instock05.59000https://www.brildor.com/media/catalog/product/v/i/vinilo-adhesivo-imp-subli-washaffix-transp-repos-d15.jpg494518155224722353324192259762638652372/Vinyl/Sign Making/Vinyl/Digital Printing Vinyl/Sign Making/Vinilo Impresión Digital2021-07-24T06:07:20+0000