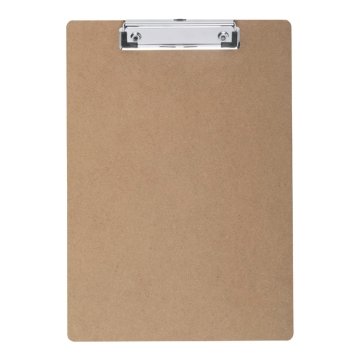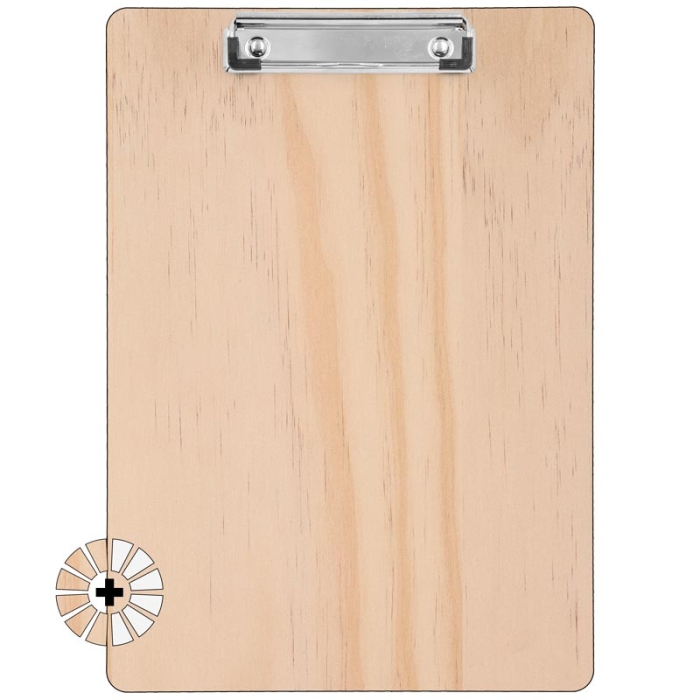
Laminated wooden boards with rounded edges. Holes prepared for attaching the clip after sublimation
Metal clip with plastic coating on the corners to prevent document damage. Includes double cap rivets for attaching to the board
The clipboards can also be customised by screen printing, laser engraving, adhesive vinyl, transfer...
THINGS TO KEEP IN MIND
The customisable side of the MDF boards has a protective plastic film that must be removed before sublimation. For added protection, the film on some clipboards may include an additional paper layer that can be easily removed
Natural wood clipboards may have protective paper on their surfaces that must be removed before sublimation
The clip is attached to the clipboard after sublimation
A rivet tool or manual tools are required to install the clip on the board
MOUNTING THE CLIP TO THE BOARD
Align the clip to the board, ensuring the holes match
Insert the double cap rivets:
The head with the shank (longer part) should be on the back of the board
The other head (cap) will rest over the holes of the clip
Gently tap with a rubber mallet the tool or piece of the rivet size to secure it
Ensure the clip is firmly attached to the clipboard
MEASUREMENTS
Ref.
054499
055891
054500
055892
DIN Format
A4
A4
A4+
A4+
Wood
MDF
Natural
MDF
Natural
Printing area (cm)
23 x 32
23 x 32
23 x 38
23 x 38
Thickness (mm)
3
3
3
3
Weight (g)
232
166
278
189
RECOMMENDED SUBLIMATION INSTRUCTIONS AND PARAMETERS
Parameters indicated are for guidance only. It is recommended to conduct preliminary tests to make necessary adjustments before starting production.
Print the design in mirror mode
Heat the press between 180-190 °C
Place protective paper on the base of the press
Place the board and the printed side of the paper on top
Place another protective paper on top
Press at a medium-low pressure for 90 seconds
Using a protective glove, remove the newly sublimated clipboard
Carefully remove the paper
Repeat the same process on the opposite side if desired
https://www.brildor.com/en/sublimable-wooden-clipboard-mounting-clip53905Sublimable Wooden Clipboard with Mounting Clip<p><a name="know-more"></a></p>
<h2>More information about the Sublimable Wooden Clipboard with Mounting Clip</h2>
<p> </p>
<p><strong>INDEX</strong></p>
<p>> <a href="#know-more1">Description</a></p>
<p>> <a href="#know-more2">Things to keep in mind</a></p>
<p>> <a href="#know-more3">Mounting the clip to the board</a></p>
<p>> <a href="#know-more4">Measurements</a></p>
<p>> <a href="#know-more5">Recommended sublimation instructions and parameters</a></p>
<p> </p>
<p class="enlace"><a id="know-more1"></a> </p>
<p><strong>DESCRIPTION</strong></p>
<ul>
<li>Laminated wooden boards with rounded edges. Holes prepared for attaching the clip after sublimation</li>
<li>Metal clip with plastic coating on the corners to prevent document damage. Includes double cap rivets for attaching to the board</li>
<li>The clipboards can also be customised by <span class="azul-brildor-negrita">screen printing</span>, <span class="azul-brildor-negrita">laser engraving</span>, <span class="azul-brildor-negrita">adhesive vinyl</span>, <span class="azul-brildor-negrita">transfer...</span></li>
</ul>
<p> </p>
<p class="enlace"><a id="know-more2"></a> </p>
<p><strong>THINGS TO KEEP IN MIND</strong></p>
<ul>
<li>The customisable side of the MDF boards has a protective plastic film that must be removed before sublimation. For added protection, the film on some clipboards may include an additional paper layer that can be easily removed</li>
<li>Natural wood clipboards may have protective paper on their surfaces that must be removed before sublimation</li>
<li>The clip is attached to the clipboard after sublimation</li>
<li>A rivet tool or manual tools are required to install the clip on the board</li>
</ul>
<p> </p>
<p class="enlace"><a id="know-more3"></a> </p>
<p><strong>MOUNTING THE CLIP TO THE BOARD</strong></p>
<ol>
<li>Align the clip to the board, ensuring the holes match</li>
<li>Insert the double cap rivets:
<ol>
<li>The head with the shank (longer part) should be on the back of the board</li>
<li>The other head (cap) will rest over the holes of the clip</li>
</ol>
</li>
<li>Gently tap with a rubber mallet the tool or piece of the rivet size to secure it</li>
<li>Ensure the clip is firmly attached to the clipboard</li>
</ol>
<p> </p>
<p class="enlace"><a id="know-more4"></a> </p>
<p><strong>MEASUREMENTS</strong></p>
<table>
<tbody>
<tr>
<td><strong>Ref.</strong></td>
<td style="text-align: center;"><strong>054499</strong></td>
<td style="text-align: center;"><strong>055891</strong></td>
<td style="text-align: center;"><strong>054500</strong></td>
<td style="text-align: center;"><strong>055892</strong></td>
</tr>
<tr>
<td><strong>DIN Format</strong></td>
<td style="text-align: center;">A4</td>
<td style="text-align: center;">A4+</td>
</tr>
<tr>
<td><strong>Wood</strong></td>
<td style="text-align: center;">MDF</td>
<td style="text-align: center;">Natural</td>
<td style="text-align: center;">MDF</td>
<td style="text-align: center;">Natural</td>
</tr>
<tr>
<td><strong>Printing area (cm)<br></strong></td>
<td style="text-align: center;"><span class="azul-negrita">23 x 32</span></td>
<td style="text-align: center;"><span class="azul-negrita">23 x 38</span></td>
</tr>
<tr>
<td><strong>Thickness (mm)</strong></td>
<td style="text-align: center;"><span class="azul-negrita">3</span></td>
</tr>
<tr>
<td><strong>Weight (g)</strong></td>
<td style="text-align: center;"><span class="azul-negrita">232</span></td>
<td style="text-align: center;"><span class="azul-negrita">166</span></td>
<td style="text-align: center;"><span class="azul-negrita">278</span></td>
<td style="text-align: center;"><span class="azul-negrita">189</span></td>
</tr>
</tbody>
</table>
<p> </p>
<p class="enlace"><a id="know-more5"></a> </p>
<p><strong>RECOMMENDED SUBLIMATION INSTRUCTIONS AND PARAMETERS</strong></p>
<p>Parameters indicated are <strong>for guidance only</strong>. It is recommended to conduct preliminary tests to make necessary adjustments before starting production.</p>
<ul>
<li>Print the design in <strong>mirror mode</strong></li>
<li>Heat the press between <span class="azul-negrita">180-190 °C</span></li>
<li>Place protective paper on the base of the press</li>
<li>Place the board and the printed side of the paper on top</li>
<li>Place another protective paper on top</li>
<li>Press at a <strong>medium-low</strong> pressure for <span class="azul-negrita">90 seconds</span></li>
<li>Using a protective glove, remove the newly sublimated clipboard</li>
<li>Carefully remove the paper</li>
<li>Repeat the same process on the opposite side if desired</li>
<li>Attach the clip and assemble the clipboard</li>
</ul>https://www.brildor.com/media/catalog/product/p/o/portapapeles-madera-dm3-sublimable-pinza-d11.jpg8.95instock08.95000https://www.brildor.com/media/catalog/product/p/o/portapapeles-madera-dm3-sublimable-pinza-d11.jpg14936431745174652634/Blanks/Blanks/Stationery2025-03-21T11:39:07+0000