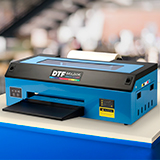
Printer for DTF Prestige R2 Pro with everything necessary to customise textiles: inks, DTF powder, and film. Everything you need to start customising with DTF from scratch.
Prints film rolls up to 35 cm wide
Original EPSON print heads
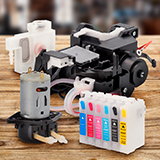
Ink recirculation system prevents sedimentation
Compact, suitable for small workspaces
Complete this pack by purchasing the Miro 13 powder applicator and CADlink software separately. And if you want to save on the licence cost, we offer everything together in the pack Ref. 056679.
Versatility: prints roll films up to 35 cm wide as well as A3 sheets
Optimised design: allows access to the inside of the printer, simplifies maintenance and repairs
Compact: desktop size, perfect for limited workspaces
Easy to install, use and maintain: fully featured for DTF (Direct Transfer to Film) personalisation
Dual print head: Epson i1600 delivers accurate colours with high print speed, capable of printing 11.27m per hour
Ink tanks: 1 Link tanks reduce refilling frequency and increase productivity
White ink recirculation system: prevents ink from settling and damaging the printhead. The white ink tank has a mechanism to agitate the white ink and the dampers include a microfilter and membrane to move the white ink
Automatic cleaning functions: keep the printhead clean, even while running
Ink warning system: light warns when ink is running low
Film detector sensor: detects when the film has run out and stops automatically
Film guides: prevents slippage during film output
Film roll holder: serves as a roll film feeder
Digital display: adjusts the printer's temperature indicator
Window in the top cover: allows checking the print quality during the printing process
Warranty: 1 year for defects of the machine and its components. Except for the print head and the waste ink pump, which are guaranteed for 3 months, provided they have been properly maintained
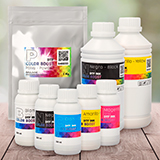
WHAT'S INCLUDED IN THE PRESTIGE R2 PRO SAVINGS PACK REF. 053946?
1
1 kg can of Brildor ECO DTF polyurethane adhesive powder
1
1 L bottle of DTF Color Prime Black ink
1
1 L bottle of DTF Prime Colour Cyan ink
1
1 L bottle of DTF Prime Magenta ink
1
1 L bottle of DTF Prime Ink Colour Yellow
1
1 L bottle of DTF Prime Colour White ink
1
30 cm x 100 m roll of DTF Station Instant Peel film
15
Days of trial DigiRIP Software (extended software version not included)
THINGS TO KEEP IN MIND
RIP software (not included) is required to operate the machine. CADLink licence available separately (Ref. 040631)
The R2 Pro + Applicator + CADlink pack (Ref. 056679) also includes the printer's equipment: inks, powder and DTF film
It does not include an input tray for sheets. Sheet feeding is done manually or using the roll holder
It is possible to personalise rigids with DTF as long as the material is suitable for heat transfers
Before using the printer for the first time: remove the safety device that immobilises the printhead
POWDER APPLICATOR DTF MIRO 13
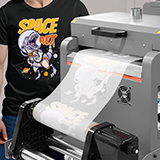
Compact 3-in-1 machine for DTF: spreads the powder on the print, cures and rolls the film ready for use
Powder reuse: spreads the powder on the printed film and collects the surplus for reuse
Temperature controlled curing: to prevent the film from warping from excessive heat
Built-in air purifier: with filters to maintain a clean working atmosphere, free of dust and volatile particles
Rewinder: at the end of film curing, the machine rewinds the film onto itself for easy film handling
Easy to install and use: it does not require external help or special tools for its installation. Includes wheels for easy moving
Compatible: with DTF Prestige A4, Prestige R2 and R2 Pro printers. It can also be compatible with other brands as the applicator accepts film rolls with a maximum width of 33 cm
Scan the QR that you will receive with your equipment to access all the material for the installation, use and maintenance of this printer and applicator. In the link you can download instructions, manuals and even video tutorials
TECHNICAL SPECIFICATIONS
A3 PRESTIGE R2 PRO PRINTER
Printer heads
2 x (Epson i1600)
Ink system
Refillable ink tanks (CMYKW)
Supported Operating System
Windows XP/7/10
Mainboard
Hosonsoft
Software
RIP DigiRIP
Maximum roll width (cm)
35
Print resolution (dpi)
720 x 1800
Print speed (A3 sheet)
10 Passes 2.5-3m2/h, 12 Passes 1.5-2m2/h
Voltage (V)
220
Machine dimensions (cm)
77 x 35 x 35 cm
Packing dimensions (cm)
87 x 45 x 45 cm
Net weight (kg)
40
Gross weight (kg)
64,7
POWDER APPLICATOR DTF MIRO 13
Maximum roll width (cm)
33
Power consumption (kW/A)
1.17/5.3 (for 220 V)
Voltage (VAC | Hz)
220 (±10) | 50/60
Machine dimensions in use (cm)
102 x 57 x 50,6 cm
Packing dimensions (cm)
72 x 62 x 49 cm
Net weight (kg)
35
Gross weight (kg)
50
MAINTENANCE RECOMMENDATIONS
The following maintenance actions are necessary to ensure that your machine is in good working order. Please refer to the videos for more information.
Daily start
Daily end
Weekly
As needed
Shake white ink
✔
✗
✗
✗
Head cleaning
✔
✗
✗
✗
Nozzle check
✔
✗
✗
✗
Filling ink tanks
✔
✗
✗
✗
Cleaning around the printhead
✗
✔
✗
✗
Cleaning around the head
✗
✔
✗
✗
Cleaning wiper
✗
✔
✗
✗
Cleaning capping
✗
✔
✗
✗
Wet the capping station with cleaning solution.
✗
✔
✗
✗
Empty the waste ink tank
✗
✗
✔
✔
Cleaning encoder strip
✗
✗
✔
✔
Cleaning pinch rollers
✗
✗
✔
✔
Cleaning the ink tank
✗
✗
✗
✔
Pulling the drain line
✗
✗
✗
✔
INSTRUCTIONS AND PARAMETERS FOR THE APPLICATION OF THE DTF TECHNIQUE
Indications for guidance only. They may vary depending on the condition of the equipment and materials used. Pre-testing is recommended before starting production.
STEP 1. FILM PREPARATION
Check that the ambient temperature is 20-30 °C and humidity is above 50%
Print the design in mirror mode on the film. Include a layer of white at the end
Remove the film from the printer tray carefully, without touching the ink
Pre-heat transfer plate to 165 °C (*)
Sprinkle DTF powder over the design printed on the film. Keep the remaining powder in a container so that it does not get wet
Place the film on the base of the transfer plate and lower the top plate until it is 3-4 cm above the film, without touching it
Cure the film for 2 minutes. Check that the powder has melted to form a film
(*) If you do not want to apply the design to the fabric immediately, you should cure the powder at a temperature of 190°C for 8-10 minutes. This will allow the film to form a screen-printed transfer so that you can apply it at the desired time.
STEP 2. APPLYING THE DESIGN
If the fabric is cotton, pre-iron it at 165 °C. If it is polyester, it does not need to be pre-ironed
Place the film on the garment
Iron at 165 °C with medium-high pressure for 15 seconds if the fabric is cotton
Iron at 140°C with medium-high pressure for 50 seconds if the fabric is polyester or polyester-cotton blend
Remove the garment from the transfer iron and let it cool down.
https://www.brildor.com/en/dtf-printer-a3-prestige-r2-pro-savings-pack52426DTF Printer A3 Prestige R2 Pro - Saving Packs<p class="enlace"> </p>
<h2>More information about the DTF A3 Prestige R2 Pro printer</h2>
<p> </p>
<p><strong>INDEX</strong></p>
<p>> <a href="#saber-mas1">Features</a></p>
<p>> <a href="#saber-mas5">What is included in the Prestige R2 Pro saver pack - Ref. 053946?</a></p>
<p>> <a href="#saber-mas2">Things to keep in mind</a></p>
<p>> <a href="#saber-mas10">Powder applicator DTF Miro 13</a></p>
<p>> <a href="#saber-mas11">Rip CADlink Digital Factory v11 DTF software</a></p>
<p>> <a href="#saber-mas8">Supporting material</a></p>
<p>> <a href="#saber-mas3">Technical specifications</a></p>
<p>> <a href="#saber-mas7">Maintenance recommendations</a></p>
<p>> <a href="#saber-mas9">Instructions and parameters for applying the DTF technique</a></p>
<p>> <a href="#saber-mas7">Related posts</a></p>
<p> </p>
<p class="enlace"> </p>
<p><strong>FEATURES</strong></p>
<ul>
<li><strong>Versatility: </strong>prints roll films up to <span class="azul-negrita">35 cm</span> wide as well as A3 sheets</li>
<li><strong>Optimised design: </strong>allows access to the inside of the printer, simplifies maintenance and repairs</li>
<li><strong>Compact:</strong> desktop size, perfect for limited workspaces</li>
<li><strong>Easy to install, use and maintain: </strong>fully featured for <span class="azul-brildor-negrita">DTF</span> (Direct Transfer to Film) personalisation</li>
<li><strong>Dual print head: </strong>Epson i1600 delivers accurate colours with high print speed, capable of printing<span class="azul-negrita"> 11.27m</span> per hour</li>
<li><strong>Ink tanks: </strong> <span class="azul-negrita">1 L</span><strong>ink tanks </strong>reduce refilling frequency and increase productivity</li>
<li><strong>White ink recirculation system:</strong> prevents ink from settling and damaging the printhead. The white ink tank has a mechanism to agitate the white ink and the dampers include a microfilter and membrane to move the white ink</li>
<li><strong>Automatic cleaning functions: </strong>keep the printhead clean, even while running</li>
<li><strong>Ink warning system</strong>: light warns when ink is running low</li>
<li><strong>Film detector sensor</strong>: detects when the film has run out and stops automatically</li>
<li><strong>Film guides:</strong> prevents slippage during film output</li>
<li><strong>Film roll holder</strong>: serves as a roll film feeder</li>
<li><strong>Digital display</strong>: adjusts the printer's temperature indicator</li>
<li><strong>Window in the top cover: </strong>allows checking the print quality during the printing process</li>
<li><strong>Warranty</strong>: <strong>1 year</strong> for defects of the machine and its components.<strong> Except for the print head and the waste ink pump</strong>, which are guaranteed for <strong>3 months</strong>, provided they have been properly maintained</li>
</ul>
<p> </p>
<p class="enlace"> </p>
<p><strong>WHAT'S INCLUDED IN THE PRESTIGE R2 PRO SAVINGS PACK REF. 053946?</strong></p>
<table>
<tbody>
<tr>
<td><span class="azul-negrita">1</span></td>
<td><span class="azul-negrita">1 kg</span> can of Brildor ECO DTF polyurethane adhesive powder</td>
</tr>
<tr>
<td><span class="azul-negrita">1</span></td>
<td><span class="azul-negrita">1 L</span> bottle of DTF Color Prime Black ink</td>
</tr>
<tr>
<td><span class="azul-negrita">1</span></td>
<td><span class="azul-negrita">1 L</span> bottle of DTF Prime Colour Cyan ink</td>
</tr>
<tr>
<td><span class="azul-negrita">1</span></td>
<td><span class="azul-negrita">1 L</span> bottle of DTF Prime Magenta ink</td>
</tr>
<tr>
<td><span class="azul-negrita">1</span></td>
<td><span class="azul-negrita"> 1 L </span>bottle of DTF Prime Ink Colour Yellow</td>
</tr>
<tr>
<td><span class="azul-negrita">1</span></td>
<td><span class="azul-negrita">1 L</span> bottle of DTF Prime Colour White ink</td>
</tr>
<tr>
<td><span class="azul-negrita">1</span></td>
<td><span class="azul-negrita">30 cm</span> x <span class="azul-negrita">100 m</span> roll of DTF Station Instant Peel film</td>
</tr>
<tr>
<td><span class="azul-negrita">15</span></td>
<td>Days of trial DigiRIP Software (extended software version not included)</td>
</tr>
</tbody>
</table>
<p class="enlace"> </p>
<p><strong>THINGS TO KEEP IN MIND</strong></p>
<ul>
<li>RIP software (not included) is required to operate the machine. CADLink licence available separately (Ref. 040631)</li>
<li><strong>The R2 Pro + Applicator + CADlink pack (Ref. 056679) also includes the printer's equipment</strong>: inks, powder and DTF film</li>
<li>It does not include an input tray for sheets. Sheet feeding is done manually or using the roll holder</li>
<li>It is possible to personalise rigids with DTF as long as the material is suitable for heat transfers</li>
<li><span class="rojo-negrita">Before using the printer for the first time:</span> remove the safety device that immobilises the printhead</li>
</ul>
<p> </p>
<p class="enlace"> </p>
<p><strong>POWDER APPLICATOR DTF MIRO 13</strong></p>
<ul>
<li><strong>Compact 3-in-1 machine for DTF:</strong> spreads the powder on the print, cures and rolls the film ready for use</li>
<li><strong>Powder reuse:</strong> spreads the powder on the printed film and collects the surplus for reuse</li>
<li><strong>Temperature controlled curing: </strong>to prevent the film from warping from excessive heat</li>
<li><strong>Built-in air purifier:</strong> with filters to maintain a clean working atmosphere, free of dust and volatile particles</li>
<li><strong>Rewinder</strong>: at the end of film curing, the machine rewinds the film onto itself for easy film handling</li>
<li><strong>Easy to install and use:</strong> it does not require external help or special tools for its installation. Includes wheels for easy moving</li>
<li><strong>Compatible:</strong> with DTF Prestige A4, Prestige R2 and R2 Pro printers. It can also be compatible with other brands as the applicator accepts film rolls with a maximum width of <span class="azul-negrita">33 cm</span></li>
<li><strong>Warranty:</strong> 1 year</li>
<li>For more information, please refer to the <a href="https://www.brildor.com/en/dtf-powder-applicator-miro-13" target="_blank" rel="noopener">DTF Miro 13 powder applicator</a> data sheet</li>
</ul>
<p> </p>
<p class="enlace"> </p>
<p><strong>RIP CADLINK DIGITAL FACTORY V11 DTF RIP SOFTWARE</strong></p>
<ul>
<li><strong>Full image control</strong>: achieve high quality prints by optimising the DTF printing process as much as possible</li>
<li>Licence in dongle format: for printers in formats up to A2</li>
<li>Enables multiple formats and media to be used</li>
<li>Optimises the performance of the printer and inks to a maximum</li>
<li>Very simple and intuitive interface with fast response time</li>
<li>Real-time nozzle status reporting, automatic printhead cleaning scheduling and maintenance alert notifications</li>
<li>Multiple preview modes: white layer (choke), colour layer, colour substitution, final result, print preview</li>
<li>Preconfigured print modes and possibility to adjust parameters manually by creating templates</li>
<li>For more information, please refer to the <a href="https://www.brildor.com/en/rip-software-cadlink-digital-factory-dtf-edition" target="_blank" rel="noopener">Rip CADlink Digital Factory v11 DTF Software</a> datasheet</li>
</ul>
<p> </p>
<p class="enlace"> </p>
<p><strong>SUPPORT MATERIAL</strong></p>
<ul>
<li>Scan the QR that you will receive with your equipment to access all the material for the installation, use and maintenance of this printer and applicator. In the link you can download instructions, manuals and even video tutorials</li>
</ul>
<p> </p>
<p class="enlace"> </p>
<p><strong>TECHNICAL SPECIFICATIONS<br></strong></p>
<table>
<tbody>
<tr>
<td colspan="2"><strong>A3 PRESTIGE R2 PRO PRINTER<br></strong></td>
</tr>
<tr>
<td><strong>Printer heads</strong></td>
<td>2 x (Epson i1600)</td>
</tr>
<tr>
<td><strong>Ink system</strong></td>
<td>Refillable ink tanks (CMYKW)</td>
</tr>
<tr>
<td><strong>Supported Operating System<br></strong></td>
<td>Windows XP/7/10</td>
</tr>
<tr>
<td><strong>Mainboard </strong></td>
<td>Hosonsoft</td>
</tr>
<tr>
<td><strong>Software<br></strong></td>
<td>RIP DigiRIP</td>
</tr>
<tr>
<td><strong>Maximum roll width (cm)</strong></td>
<td><span class="azul-negrita">35</span></td>
</tr>
<tr>
<td><strong>Print resolution (dpi)</strong></td>
<td><span class="azul-negrita">720 x 1800</span></td>
</tr>
<tr>
<td><strong>Print speed (A3 sheet)</strong></td>
<td><span class="azul-negrita">10 Passes 2.5-3<sup>m2/h</sup></span><span class="azul-negrita">, <br>12 Passes 1.5-2<sup>m2/h</sup></span></td>
</tr>
<tr>
<td><strong>Voltage (V)</strong></td>
<td><span class="azul-negrita">220</span></td>
</tr>
<tr>
<td><strong>Machine dimensions (cm)</strong></td>
<td><span class="azul-negrita">77 x 35 x 35 cm</span></td>
</tr>
<tr>
<td><strong>Packing dimensions (cm)</strong></td>
<td><span class="azul-negrita">87 x 45 x 45 cm</span></td>
</tr>
<tr>
<td><strong>Net weight (kg)</strong></td>
<td><span class="azul-negrita">40</span></td>
</tr>
<tr>
<td><strong>Gross weight (kg)</strong></td>
<td><span class="azul-negrita">64,7</span></td>
</tr>
<tr>
<td colspan="2"><strong>POWDER APPLICATOR DTF MIRO 13</strong><span class="azul-negrita"><br></span></td>
</tr>
<tr>
<td><strong>Maximum roll width (cm)<br></strong></td>
<td><strong><span class="azul-negrita">33</span><br></strong></td>
</tr>
<tr>
<td><strong>Power consumption (kW/A)<br></strong></td>
<td><strong><span class="azul-negrita">1.17/5.3 (for 220 V)</span><br></strong></td>
</tr>
<tr>
<td><strong>Voltage (VAC | Hz)<br></strong></td>
<td><strong><span class="azul-negrita">220 (±10) | 50/60</span><br></strong></td>
</tr>
<tr>
<td><strong>Machine dimensions in use (cm)<br></strong></td>
<td><strong><span class="azul-negrita">102 x 57 x 50,6 cm<br></span></strong></td>
</tr>
<tr>
<td><strong>Packing dimensions (cm)<br></strong></td>
<td><strong><span class="azul-negrita">72 x 62 x 49 cm<br></span></strong></td>
</tr>
<tr>
<td><strong>Net weight (kg)<br></strong></td>
<td><strong><span class="azul-negrita">35<br></span></strong></td>
</tr>
<tr>
<td><strong>Gross weight (kg)<br></strong></td>
<td><strong><span class="azul-negrita">50<br></span></strong></td>
</tr>
</tbody>
</table>
<p> </p>
<p class="enlace"> </p>
<p><strong>MAINTENANCE RECOMMENDATIONS</strong></p>
<p>The following maintenance actions are necessary to ensure that your machine is in good working order. Please refer to the <a href="https://www.youtube.com/playlist?list=PLvx4AE3teWBwIMRnTtEVxlf8Zmk_pChjp" target="_blank" rel="noopener">videos</a> for more information.</p>
<table>
<tbody>
<tr>
<td> </td>
<td style="text-align: center;"><strong>Daily start</strong></td>
<td style="text-align: center;"><strong>Daily end</strong></td>
<td style="text-align: center;"><strong>Weekly</strong></td>
<td style="text-align: center;"><strong>As needed</strong></td>
</tr>
<tr>
<td><strong>Shake white ink</strong></td>
<td style="text-align: center;">
<h1><span class="verde-negrita" style="font-size: 12pt;">✔</span></h1>
</td>
<td style="text-align: center;"><strong><span class="rojo-brildor">✗</span></strong></td>
</tr>
<tr>
<td><strong>Head cleaning</strong></td>
<td style="text-align: center;">
<h1><span class="verde-negrita" style="font-size: 12pt;">✔</span></h1>
</td>
<td style="text-align: center;"><strong><span class="rojo-brildor">✗</span></strong></td>
</tr>
<tr>
<td><strong>Nozzle check</strong></td>
<td style="text-align: center;">
<h1><span class="verde-negrita" style="font-size: 12pt;">✔</span></h1>
</td>
<td style="text-align: center;"><strong><span class="rojo-brildor">✗</span></strong></td>
</tr>
<tr>
<td><strong>Filling ink tanks</strong></td>
<td style="text-align: center;">
<h1><span class="verde-negrita" style="font-size: 12pt;">✔</span></h1>
</td>
<td style="text-align: center;"><strong><span class="rojo-brildor">✗</span></strong></td>
</tr>
<tr>
<td><strong>Cleaning around the printhead</strong></td>
<td style="text-align: center;"><strong><span class="rojo-brildor">✗</span></strong></td>
<td style="text-align: center;">
<h1><span class="verde-negrita" style="font-size: 12pt;">✔</span></h1>
</td>
<td style="text-align: center;"><strong><span class="rojo-brildor">✗</span></strong></td>
</tr>
<tr>
<td><strong>Cleaning around the head</strong></td>
<td style="text-align: center;"><strong><span class="rojo-brildor">✗</span></strong></td>
<td style="text-align: center;">
<h1><span class="verde-negrita" style="font-size: 12pt;">✔</span></h1>
</td>
<td style="text-align: center;"><strong><span class="rojo-brildor">✗</span></strong></td>
</tr>
<tr>
<td><strong>Cleaning wiper</strong></td>
<td style="text-align: center;"><strong><span class="rojo-brildor">✗</span></strong></td>
<td style="text-align: center;">
<h1><span class="verde-negrita" style="font-size: 12pt;">✔</span></h1>
</td>
<td style="text-align: center;"><strong><span class="rojo-brildor">✗</span></strong></td>
</tr>
<tr>
<td><strong>Cleaning capping</strong></td>
<td style="text-align: center;"><strong><span class="rojo-brildor">✗</span></strong></td>
<td style="text-align: center;">
<h1><span class="verde-negrita" style="font-size: 12pt;">✔</span></h1>
</td>
<td style="text-align: center;"><strong><span class="rojo-brildor">✗</span></strong></td>
</tr>
<tr>
<td><strong>Wet the capping station with cleaning solution.</strong></td>
<td style="text-align: center;"><strong><span class="rojo-brildor">✗</span></strong></td>
<td style="text-align: center;">
<h1><span class="verde-negrita" style="font-size: 12pt;">✔</span></h1>
</td>
<td style="text-align: center;"><strong><span class="rojo-brildor">✗</span></strong></td>
</tr>
<tr>
<td><strong>Empty the waste ink tank</strong></td>
<td style="text-align: center;"><strong><span class="rojo-brildor">✗</span></strong></td>
<td style="text-align: center;">
<h1><span class="verde-negrita" style="font-size: 12pt;">✔</span></h1>
</td>
<td style="text-align: center;">
<h1><span class="verde-negrita" style="font-size: 12pt;">✔</span></h1>
</td>
</tr>
<tr>
<td><strong>Cleaning encoder strip</strong></td>
<td style="text-align: center;"><strong><span class="rojo-brildor">✗</span></strong></td>
<td style="text-align: center;">
<h1><span class="verde-negrita" style="font-size: 12pt;">✔</span></h1>
</td>
<td style="text-align: center;">
<h1><span class="verde-negrita" style="font-size: 12pt;">✔</span></h1>
</td>
</tr>
<tr>
<td><strong>Cleaning pinch rollers</strong></td>
<td style="text-align: center;"><strong><span class="rojo-brildor">✗</span></strong></td>
<td style="text-align: center;">
<h1><span class="verde-negrita" style="font-size: 12pt;">✔</span></h1>
</td>
<td style="text-align: center;">
<h1><span class="verde-negrita" style="font-size: 12pt;">✔</span></h1>
</td>
</tr>
<tr>
<td><strong>Cleaning the ink tank</strong></td>
<td style="text-align: center;"><strong><span class="rojo-brildor">✗</span></strong></td>
<td style="text-align: center;">
<h1><span class="verde-negrita" style="font-size: 12pt;">✔</span></h1>
</td>
</tr>
<tr>
<td><strong>Pulling the drain line</strong></td>
<td style="text-align: center;"><strong><span class="rojo-brildor">✗</span></strong></td>
<td style="text-align: center;">
<h1><span class="verde-negrita" style="font-size: 12pt;">✔</span></h1>
</td>
</tr>
</tbody>
</table>
<p class="enlace"> </p>
<p><strong>INSTRUCTIONS AND PARAMETERS FOR THE APPLICATION OF THE DTF TECHNIQUE</strong></p>
<p>Indications <strong>for guidance</strong> only. They may vary depending on the condition of the equipment and materials used. Pre-testing is recommended before starting production.</p>
<p><strong>STEP 1. FILM PREPARATION</strong></p>
<ul>
<li>Check that the ambient temperature is <span class="azul-negrita">20-30 °C</span> and humidity is above <span class="azul-negrita">50%</span></li>
<li>Print the design in <strong>mirror mode</strong> on the film. Include a layer of white at the end</li>
<li>Remove the film from the printer tray carefully, without touching the ink</li>
<li>Pre-heat transfer plate to <span class="azul-negrita">165 °C </span><span class="naranja-negrita"><sup>(*)</sup></span><span class="azul-negrita"><br></span></li>
<li>Sprinkle DTF powder over the design printed on the film. Keep the remaining powder in a container so that it does not get wet</li>
<li>Place the film on the base of the transfer plate and lower the top plate until it is <span class="azul-negrita">3-4 cm</span> above the film, without touching it</li>
<li>Cure the film for <span class="azul-negrita">2 minutes</span>. Check that the powder has melted to form a film</li>
</ul>
<p><span style="font-size: 10pt;"><span class="naranja-negrita"><sup>(*)</sup></span> If you do not want to apply the design to the fabric immediately, you should cure the powder at a temperature of <span class="azul-negrita">190°C</span> for <span class="azul-negrita">8-10 minutes.</span> This will allow the film to form a screen-printed transfer so that you can apply it at the desired time.</span></p>
<p><strong>STEP 2. APPLYING THE DESIGN</strong></p>
<ul>
<li>If the fabric is cotton, pre-iron it at <span class="azul-negrita">165 °C</span>. If it is polyester, it does not need to be pre-ironed</li>
<li>Place the film on the garment</li>
<li>Iron at <span class="azul-negrita">165 °C</span> with <strong>medium-high</strong> pressure for<span class="azul-negrita"> 15 seconds</span> if the fabric is cotton</li>
<li>Iron at <span class="azul-negrita">140°C</span> with <strong>medium-high</strong> pressure for <span class="azul-negrita">50 seconds</span> if the fabric is polyester or polyester-cotton blend</li>
<li>Remove the garment from the transfer iron and let it <strong>cool down</strong>.</li>
<li>Perform the peeling slowly but continuously</li>
</ul>
<p> </p>
<p class="enlace"> </p>
<p><strong>RELATED POSTS</strong></p>
<p><a title="DTF: La nueva revolución de la personalización de camisetas" href="https://www.brildor.com/blog/es/dtf-personalizacion-de-camisetas/" target="_blank" rel="nofollow noopener">DTF: The new revolution in T-shirt personalisation</a></p>
<p><a title="Cómo personalizar productos de madera con DTF" href="https://www.brildor.com/blog/es/como-personalizar-productos-de-madera-con-dtf/" target="_blank" rel="nofollow noopener">How to personalise wooden products with DTF</a></p>
<p><a title="DTF: Problemas y soluciones" href="https://www.brildor.com/blog/es/dtf-problemas-soluciones/" target="_blank" rel="nofollow noopener">DTF: Problems and solutions</a></p>https://www.brildor.com/media/catalog/product/i/m/impresora-dtf-a3-prestige-r2-pro-pack-consumibles-d31.jpg5999instock05999000https://www.brildor.com/media/catalog/product/i/m/impresora-dtf-a3-prestige-r2-pro-pack-consumibles-d31.jpg4410850804521855244552488525145260953556/DTF Printing/DTF Printing/Printing Equipment & Software/Offers/Productos destacados2024-07-24T09:33:58+0000