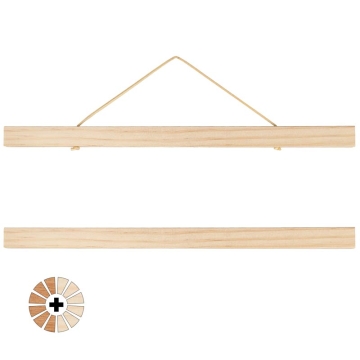
Canvas Mounting Frame Kits
Canvas Mounting Frame Kits
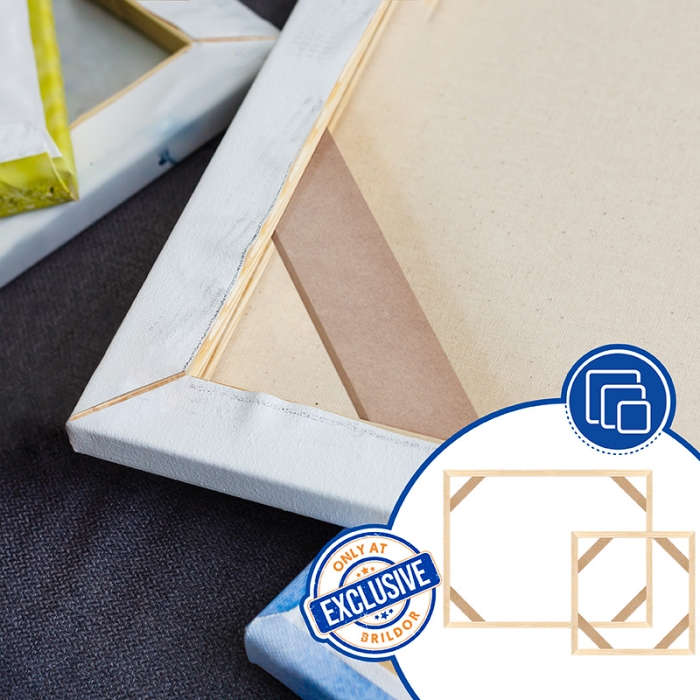
They include everything you need to assemble canvas stretcher frames, with professional results.
- With 1 kit you can assemble up to 5 square frames
- With 2 kits of different sizes you can assemble rectangular frames
- Easy to assemble. No additional tools required
More information
https://www.brildor.com/en/canvas-mounting-frame-kits
50195
Canvas Mounting Frame Kits
<p class="enlace"><a id="saber-mas"></a> </p>
<h2>More information about the Canvas Mounting Frame Kits</h2>
<p><strong>INDEX</strong></p>
<p>> <a href="#saber-mas1">Description</a></p>
<p>> <a href="#saber-mas2">What does each kit contain?</a></p>
<p>> <a href="#saber-mas3">Things to keep in mind</a></p>
<p>> <a href="#saber-mas4">Dimensions </a></p>
<p>> <a href="#saber-mas5">How to mount a canvas painting?</a></p>
<p> </p>
<p class="enlace"><a id="saber-mas1"></a> </p>
<p><strong>DESCRIPTION</strong></p>
<ul>
<li>Each kit contains everything you need to assemble the frames and then frame the canvases</li>
<li>Top quality pinewood side rails. They come in different sizes so you can combine them to create square or rectangular frames</li>
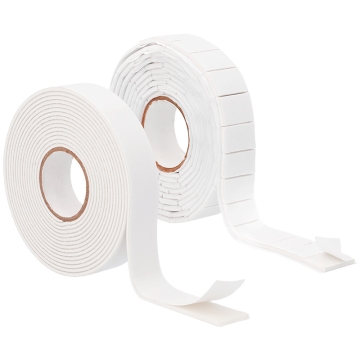
<li>The bars have an adhesive tape that is easy to remove with your fingers. For more fixation you can purchase double sided padded adhesive tape, available in <strong>Related Products</strong></li>
<li>Corner pieces are not necessary but make assembly easier: they prevent the adhesive tape from touching the canvas. Reusable</li>
<li>Staples from the accessory set ensure that the two bars are joined at right angles to each other</li>
<li>The support plates guarantee the stability of the frame and prevent it from warping</li>
</ul>
<p> </p>
<p class="enlace"><a id="saber-mas2"></a> </p>
<p><strong>WHAT DOES EACH KIT CONTAIN?</strong></p>
<ul>
<li>20 wooden side bars</li>
<li>20 support plates </li>
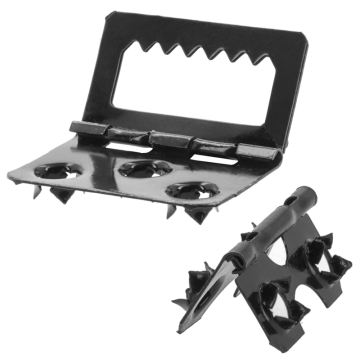
<li>5 accessory sets: 4 staples, 2 hangers, 4 screws, 2 wall hooks and 2 frame hooks</li>
</ul>
<p> </p>
<p class="enlace"><a id="saber-mas3"></a> </p>
<p><strong>THINGS TO KEEP IN MIND</strong></p>
<ul>
<li>It is advisable to mount the frame on a smooth surface of a suitable size so that it can be used as a support</li>
<li>To mount rectangular frames you have to buy at least 2 kits with profiles of different sizes</li>
</ul>
<p> </p>
<p class="enlace"><a id="saber-mas4"></a> </p>
<p><strong>DIMENSIONS <br></strong></p>
<p><strong>Wooden sides<br></strong></p>
<table width="786">
<tbody>
<tr>
<td><strong>Reference</strong></td>
<td style="text-align: center;"><strong>049470</strong></td>
<td style="text-align: center;"><strong>049471</strong></td>
<td style="text-align: center;"><strong>049472</strong></td>
<td style="text-align: center;"><strong>049473</strong></td>
<td style="text-align: center;"><strong>049474</strong></td>
<td style="text-align: center;"><strong>049475</strong></td>
<td style="text-align: center;"><strong>049476</strong></td>
</tr>
<tr>
<td><strong>Bar (inch/cm)</strong></td>
<td style="text-align: center;"><span class="azul-negrita">8/20,3</span></td>
<td style="text-align: center;"><span class="azul-negrita">10/25,4<br></span></td>
<td style="text-align: center;"><span class="azul-negrita"> 11/27,9</span></td>
<td style="text-align: center;"><span class="azul-negrita"> 12/30,5</span></td>
<td style="text-align: center;"><span class="azul-negrita"> 14/35,6</span></td>
<td style="text-align: center;"><span class="azul-negrita"> 16/40,6</span></td>
<td style="text-align: center;"><span class="azul-negrita"> 20/50,8</span></td>
</tr>
<tr>
<td><strong>Weight (g)</strong></td>
<td style="text-align: center;"><span class="azul-negrita">734</span></td>
<td style="text-align: center;"><span class="azul-negrita">866<br></span></td>
<td style="text-align: center;"><span class="azul-negrita">944<br></span></td>
<td style="text-align: center;"><span class="azul-negrita">1196<br></span></td>
<td style="text-align: center;"><span class="azul-negrita">1132<br></span></td>
<td style="text-align: center;"><span class="azul-negrita">1286<br></span></td>
<td style="text-align: center;"><span class="azul-negrita">1558<br></span></td>
</tr>
<tr>
<td><strong>Packaging</strong></td>
<td style="text-align: center;"><span class="azul-negrita">26,1 x 10,1 x 8</span></td>
<td style="text-align: center;"><span class="azul-negrita">31,2 x 10 x 8<br></span></td>
<td style="text-align: center;"><span class="azul-negrita">34 x 10 x 8<br></span></td>
<td style="text-align: center;"><span class="azul-negrita">36,9 x 10,1 x 8<br></span></td>
<td style="text-align: center;"><span class="azul-negrita">42 x 10,1 x 8<br></span></td>
<td style="text-align: center;"><span class="azul-negrita">47 x 10,1 x 8<br></span></td>
<td style="text-align: center;">
<p><span class="azul-negrita">57,2 x 10,1 x 8</span></p>
</td>
</tr>
</tbody>
</table>
<p> </p>
<p><strong>Corner posts of silicone<br></strong></p>
<table width="792">
<tbody>
<tr>
<td><strong>Reference</strong></td>
<td><strong>049477</strong></td>
</tr>
<tr>
<td><strong>Dimensions (mm)</strong></td>
<td><span class="azul-negrita">10 X 4,3 X 1,4</span></td>
</tr>
<tr>
<td><strong>Weight (g)</strong></td>
<td><span class="azul-negrita">490<br></span></td>
</tr>
<tr>
<td><strong>Packaging</strong></td>
<td><span class="azul-negrita">26,2 X 11,5 X 7,8<br></span></td>
</tr>
</tbody>
</table>
<p> </p>
<p class="enlace"><a id="saber-mas5"></a> </p>
<p><strong>HOW TO MOUNT A CANVAS PAINTING?</strong></p>
<ul>
<li>Tear off the protective paper from the adhesive tape on the wooden bars</li>
<li>Insert the bars into the 4 silicone corner pieces</li>
<li>Make sure that the taped sides of the 4 bars are facing outwards</li>
<li>Place the untaped side of the assembled frame on the back of the tarpaulin to mark the edges of the corner pieces</li>
<li>Cut off the excess canvas at the markings</li>
<li>Press each of the bars successively so that they adhere to the canvas</li>
<li>Trim the 4 edges of the canvas at a <span class="azul-negrita">45º</span> angle</li>
<li>Remove the corner pieces while pressing</li>
<li>Make a centre cut in each corner and fold them over at each end to adhere them to the bars</li>
<li>Fold two sides of the frame up and insert the staples from the accessory kit into the existing holes. Do the same procedure for the other 3 corners</li>
<li>Remove the masking paper from the adhesive tape on the bar and stick each piece of tarpaulin to the bar</li>
<li>Insert a backing plate in each corner for extra fixation</li>
<li>To hang the painting on the wall you can use the hooks and screws included in the accessory kit</li>
</ul>
https://www.brildor.com/media/catalog/product/b/a/barras-montaje-marcos-lienzos-d7.jpg
32.9
instock
0
32.9
0
0
0
https://www.brildor.com/media/catalog/product/b/a/barras-montaje-marcos-lienzos-d7.jpg
4198
21167
21174
22946
28194
43297
50143
50160
53312
53344
/BLANKS
/BLANKS/Canvas
/BLANKS/Canvases
2023-06-13T07:46:46+0000
