🔵 Custom badges: how to make them, ideas and tips
🔵 Custom badges: how to make them, ideas and tips
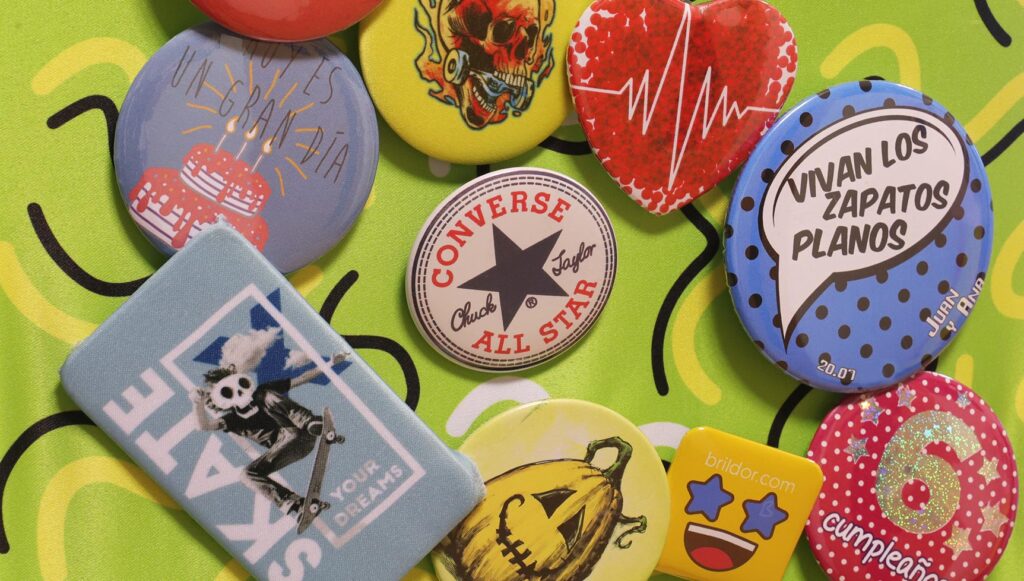
Custom badges are a classic that continues to thrive, perfect for promotions, events, and unique products. They emerged in the late 19th century as a practical way to display messages, and today, thanks to digital printing, customising them is easier and more popular than ever.
In this post, we explain step by step how to create customised badges with professional finishes for any occasion.
Why include badges in your customisation catalogue?
Badges are cost-effective, easy to produce, and have a huge visual impact, making them a great option for any customisation business.
Key Advantages:
- Versatility: Ideal for advertising campaigns, events, merchandising, or personalised gifts.
- Profitability: They require a low initial investment and offer a significant profit margin.
- Customer Attraction: They draw attention at fairs, events, and complement other personalised products.
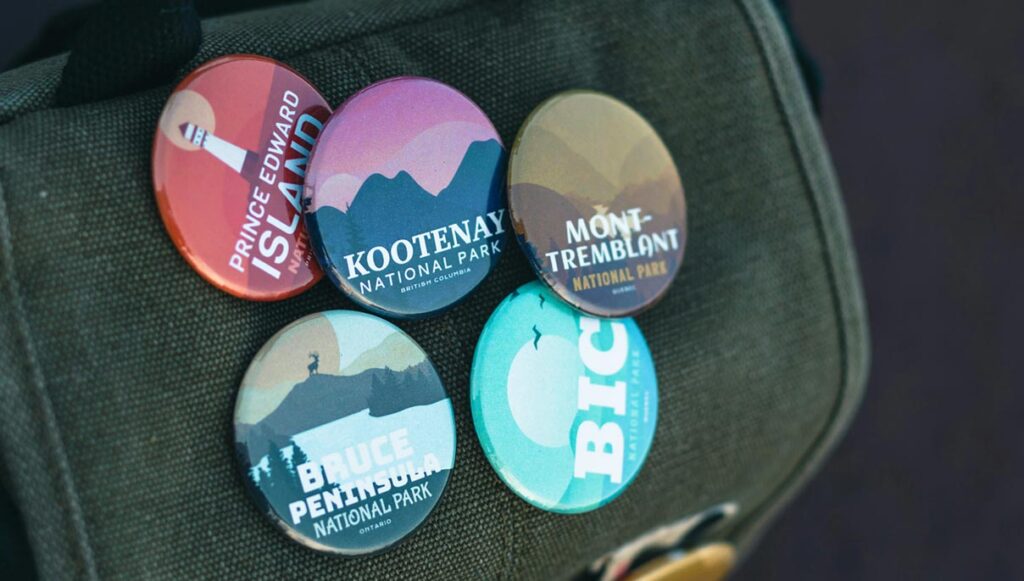
Although the most popular are pin badges for attaching to clothing, there are also formats such as keyrings, magnets, bottle openers, mirrors, and accessories for headbands or hair ties. Adding badges to your catalogue will allow you to offer an attractive and adaptable product, suitable for both businesses and individuals.
What do you need to make badges?
Creating personalised badges is a simple process, but it requires the right materials and tools. Here are the basics to get started:
- Badge Making Machine: It is essential to have a professional quality model.
- Badges: Includes metal discs, protective film, and the back base of each badge.
- Editing software: Use Canva, Illustrator, Photoshop... to create standout designs.
- Printing Paper: It is essential for achieving vibrant and long-lasting colours. We recommend high-quality paper of 100-120 g/m².
👉 Explore our badge machines and complete kits to simplify the process.
How to Design and Print Your Badges
The process for creating personalised badges is straightforward and consists of three key steps: print, cut, and assemble. Below, we explain it in detail:
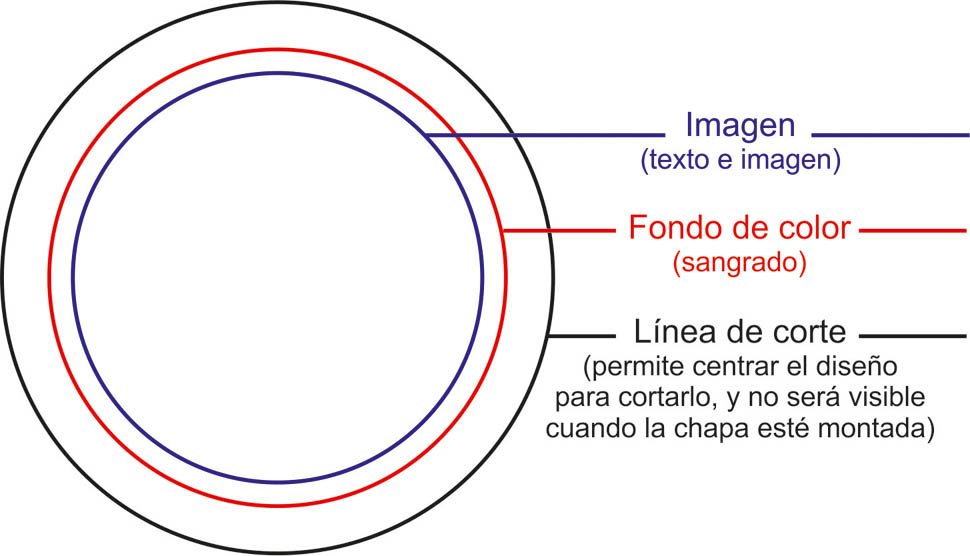
1. DESIGN: Before starting, define the size of the badge you are going to produce (25 mm, 38 mm, 59 mm, etc.), as this will determine the size of your design. To ensure the design is perfect, create three overlapping circles in your file:
- Blue circle: Marks the visible area of the badge. Ensure all content fits within.
- Red circle: Indicates the edge of the badge. Although the image should cover it, avoid placing important text or faces in this area.
- Black circle: Marks the cutting line. This circle will not be visible, but it must be the same colour as the red in case it is partially exposed.

2. PRINT AND CUT: Print your design on quality paper (90-120 g/m²) to ensure vibrant colours and edges that can be easily folded. You can use any domestic printer.
For cutting, you can use scissors, but we recommend using a die cutter to cut the discs precisely. Ensure it is compatible with the size of the badges you are going to produce. Investing in precise cutting tools will save you time and reduce errors during assembly.
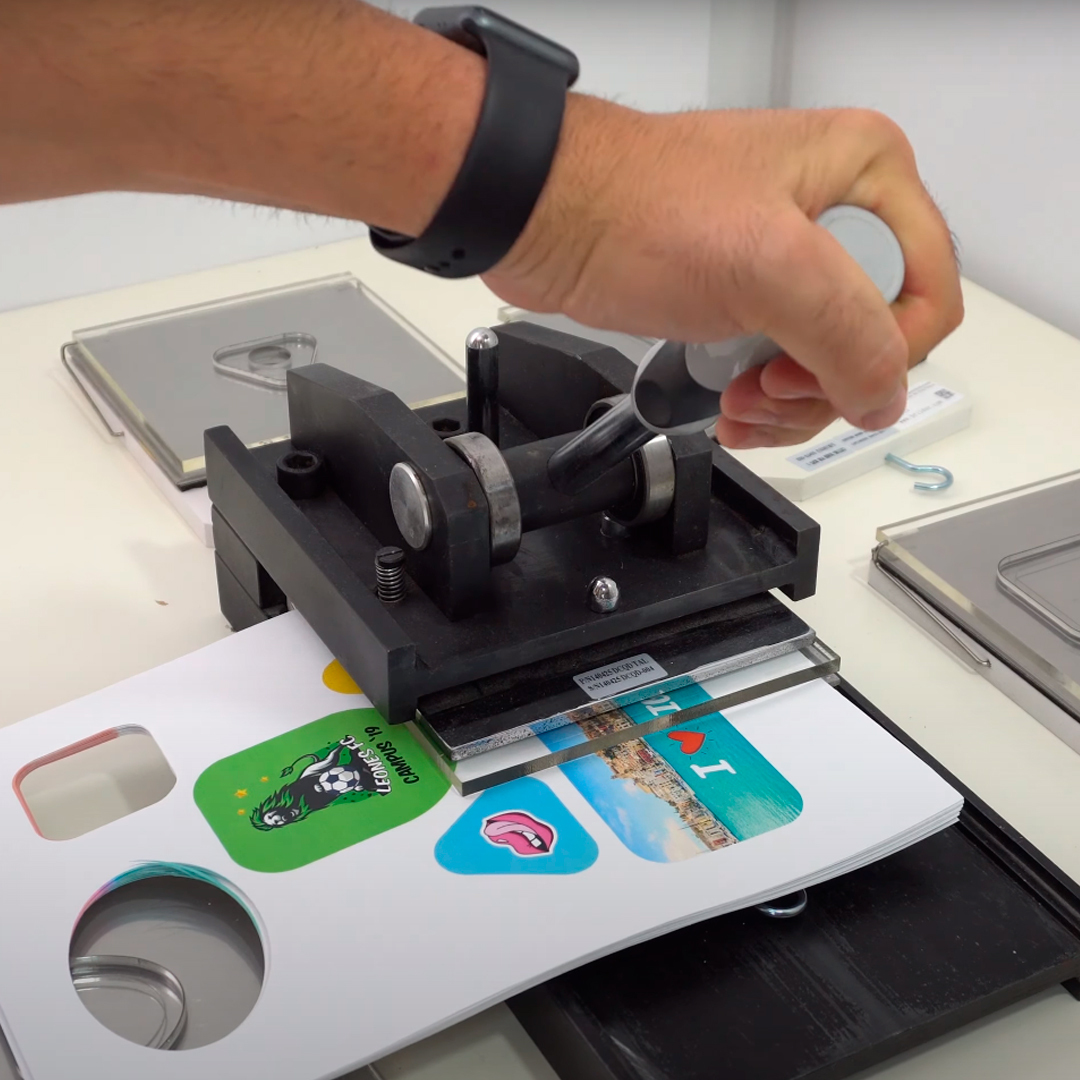
3. ASSEMBLE: The assembly of customisable badges is done using a badge machine, which operates like a simple press. Follow these steps:
- Place the design and the protective film: In the first step, the machine folds the printed paper and the transparent sheet together over the metal disc of the badge.
- Add the backing: In the second step, attach the backing of the badge, which can be a pin, magnet, keyring, bottle opener, etc.
- At the end, the badge and its back will fit perfectly, keeping the edges of the paper tucked in to prevent them from coming loose. Ensure there are no bubbles and that the paper is well secured.
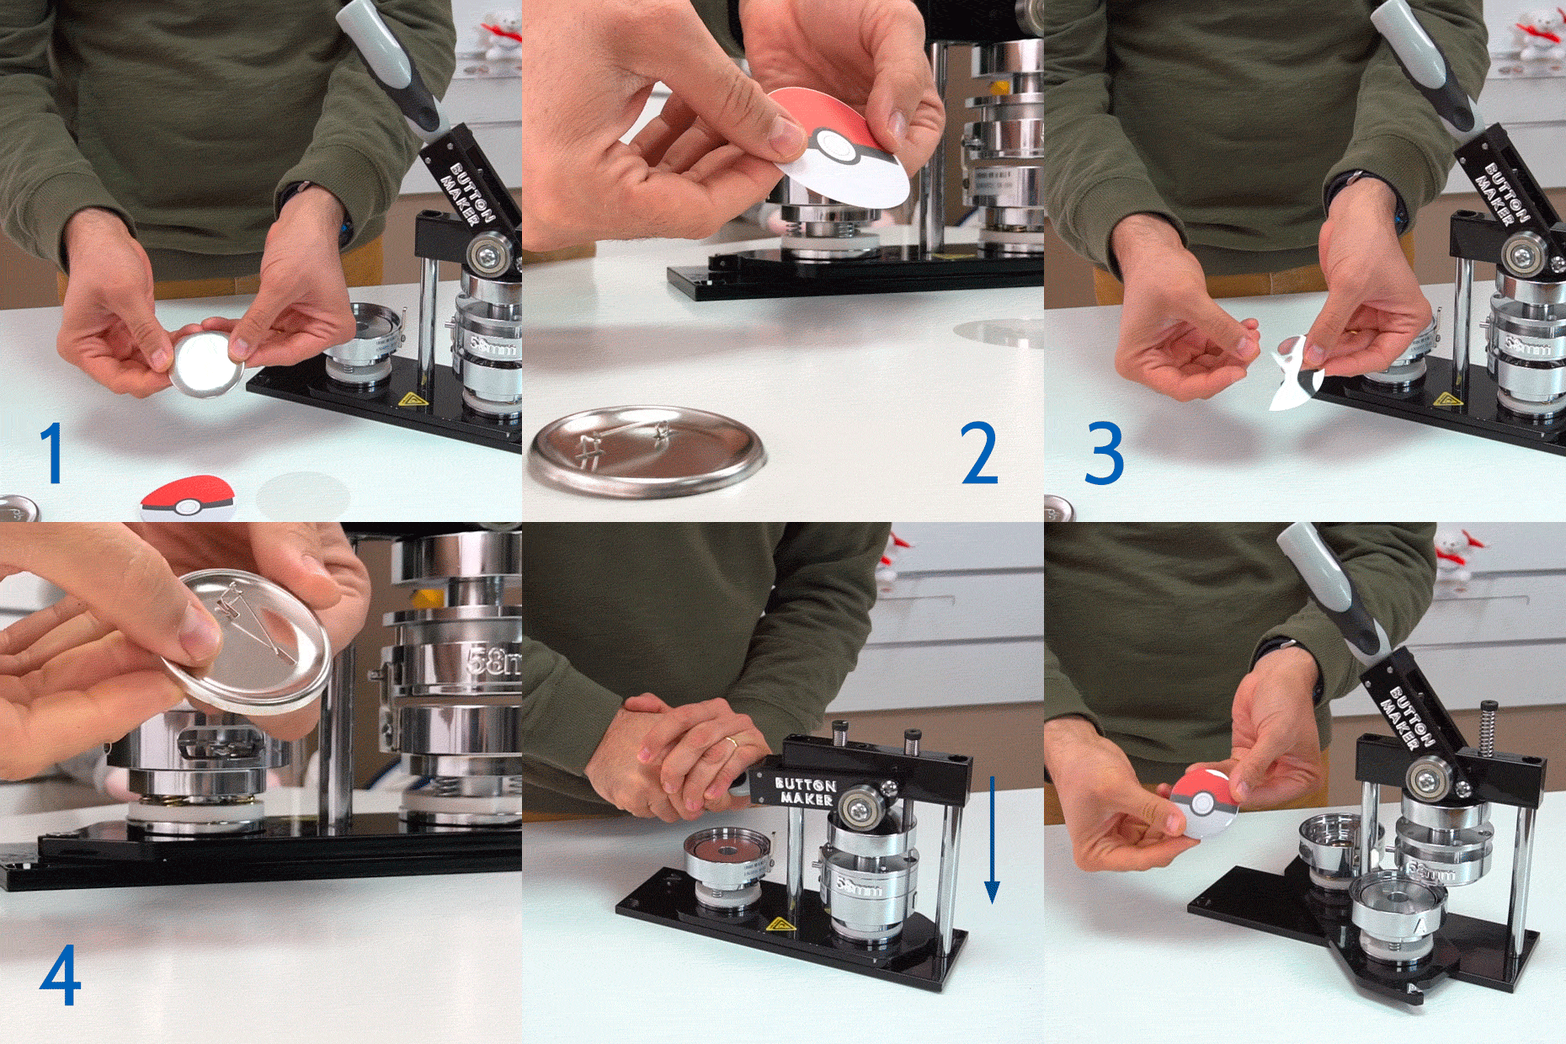
Tip: If you encounter issues, ensure that the badge maker is correctly adjusted according to the type of backing you are using, as each has a different thickness.
Ideas for Incorporating Badges into Your Business
Although the 58 mm round badges are the most popular, there is a wide variety of sizes, shapes, and uses, offering almost infinite possibilities for customisation.
Customise badges for promotions, collectible designs, or messages at events. A bonus? Create themed kits for special seasons like Christmas. Get inspired with more ideas on our Pinterest board and start imagining all you can create.
Seguir el tablero de Pedrería de Brildor en Pinterest.
▶️ Create ORIGINAL BADGES: Sublimation, Vinyl, and Foil
With their low cost, badges are a cost-effective option even for small runs, ideal for freelancers and small businesses. Are you considering offering this product in your shop?
If you have any questions, let us know by leaving a comment! Remember that every day we post a lot of ideas, offers, and news about different customisation techniques on our social media. To make sure you don't miss anything, follow us on Instagram and TikTok. Oh, and don't forget to subscribe to our YouTube channel to keep learning with us.
See you in the next post!

WE WANT TO KNOW WHAT YOU THINK